Invoice Cove runs entirely on your device, invoices, quotes, customers and your business profile are stored locally, not on any Invoice Cove server. We do not collect, see, or receive any data about your invoices or how you use the app. There are no analytics, no tracking, nothing sent anywhere in the background. The only time the app itself needs an internet connection is to process a one-time Invoice Cove Pro purchase through Google Play. See the full Privacy Policy for details.
Contents
1 Home screen
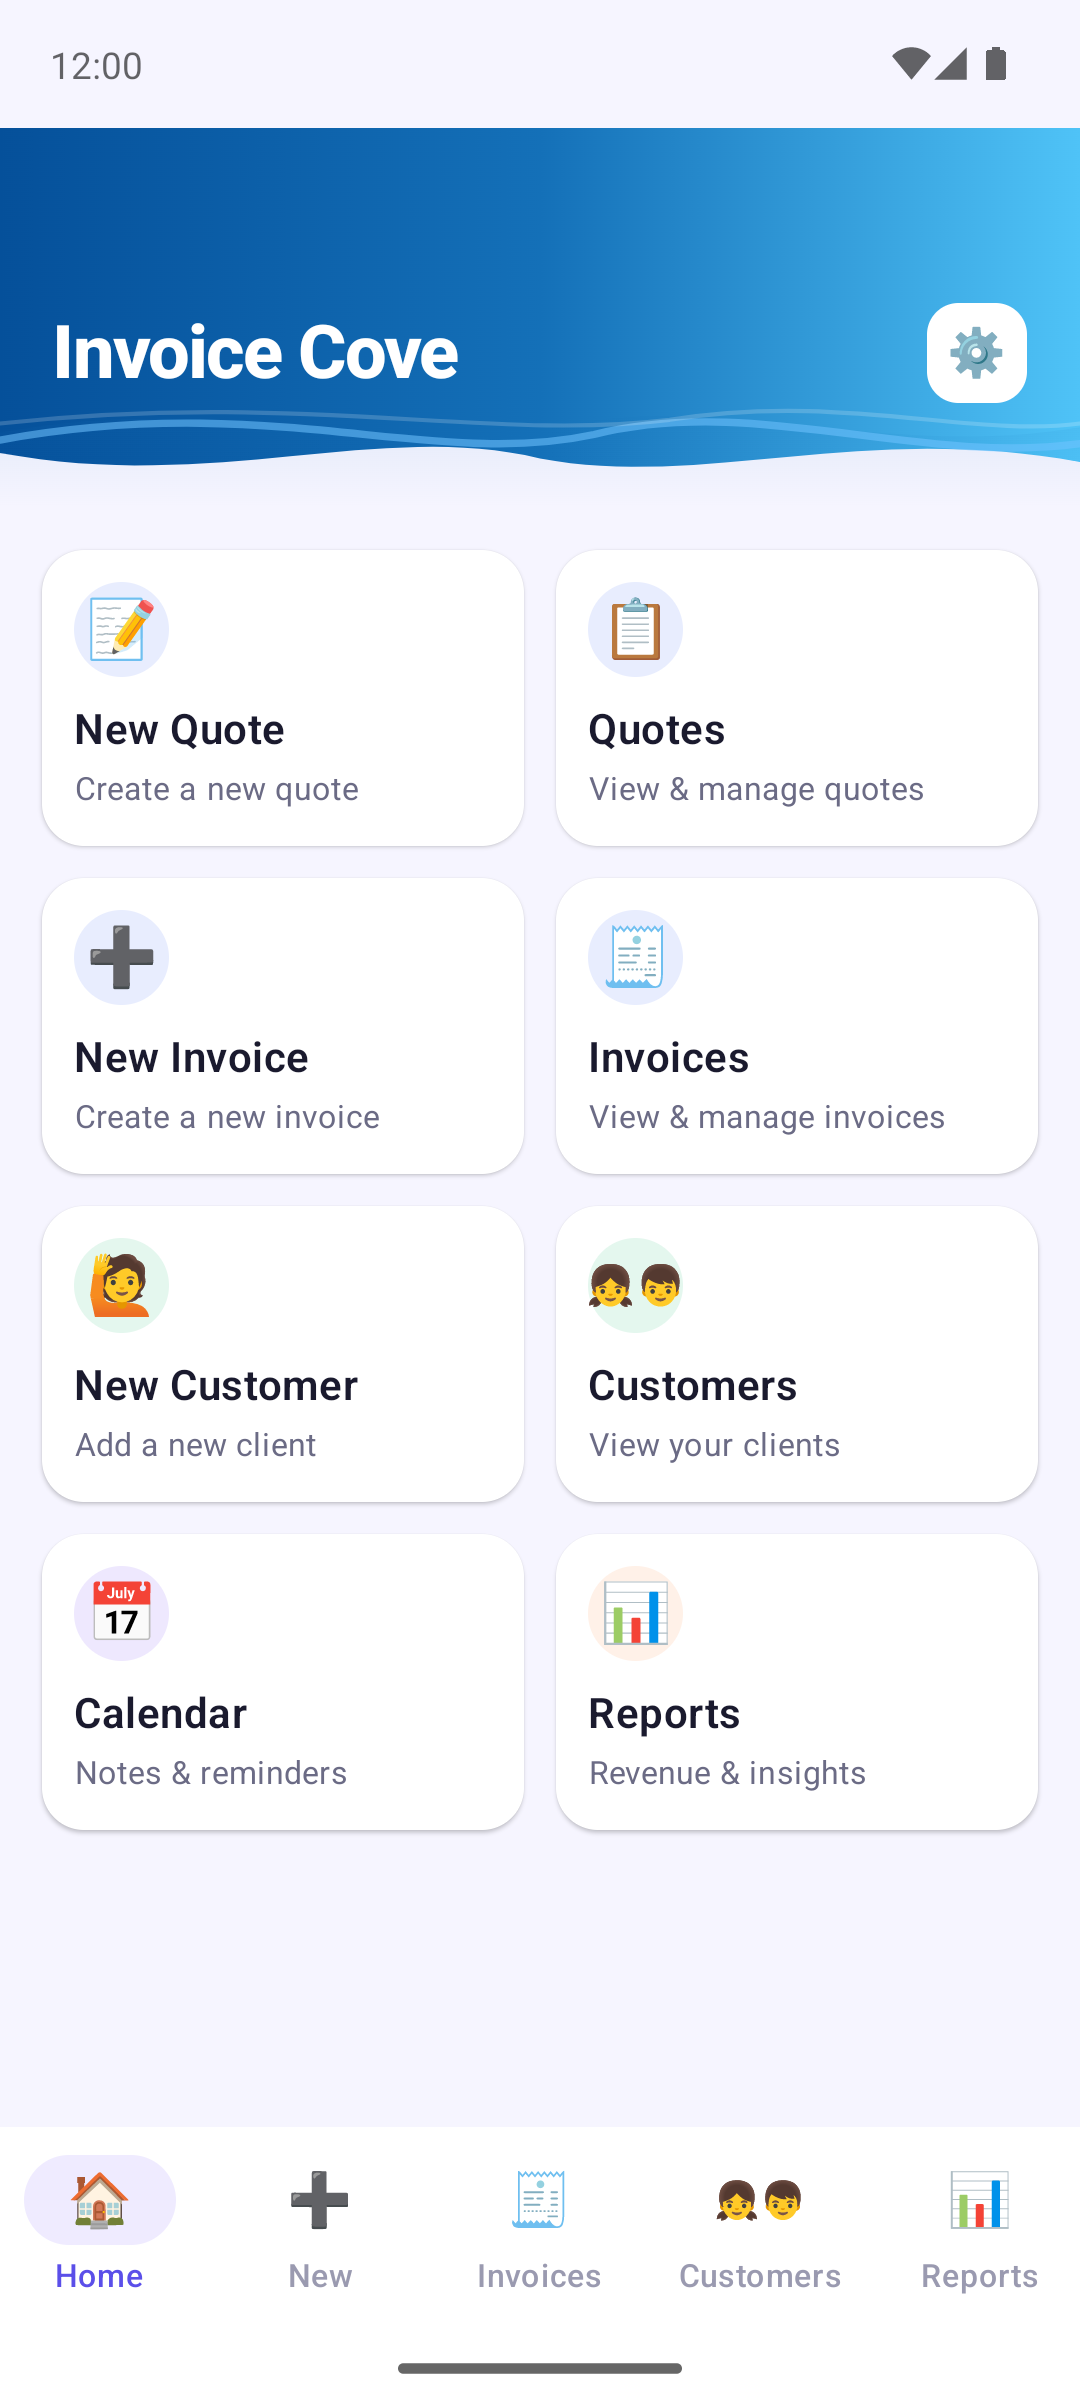
The Home screen is your starting point, with one tile for each main action: New Quote, Quotes, New Invoice, Invoices, New Customer, Customers, Calendar and Reports. Tap any tile to jump straight there.
The bar at the bottom gives you quick access to Home, New (new invoice), Invoices, Customers and Reports.
The gear icon (⚙️) in the top-right corner of most screens opens Business Details & Settings.
2 Customers
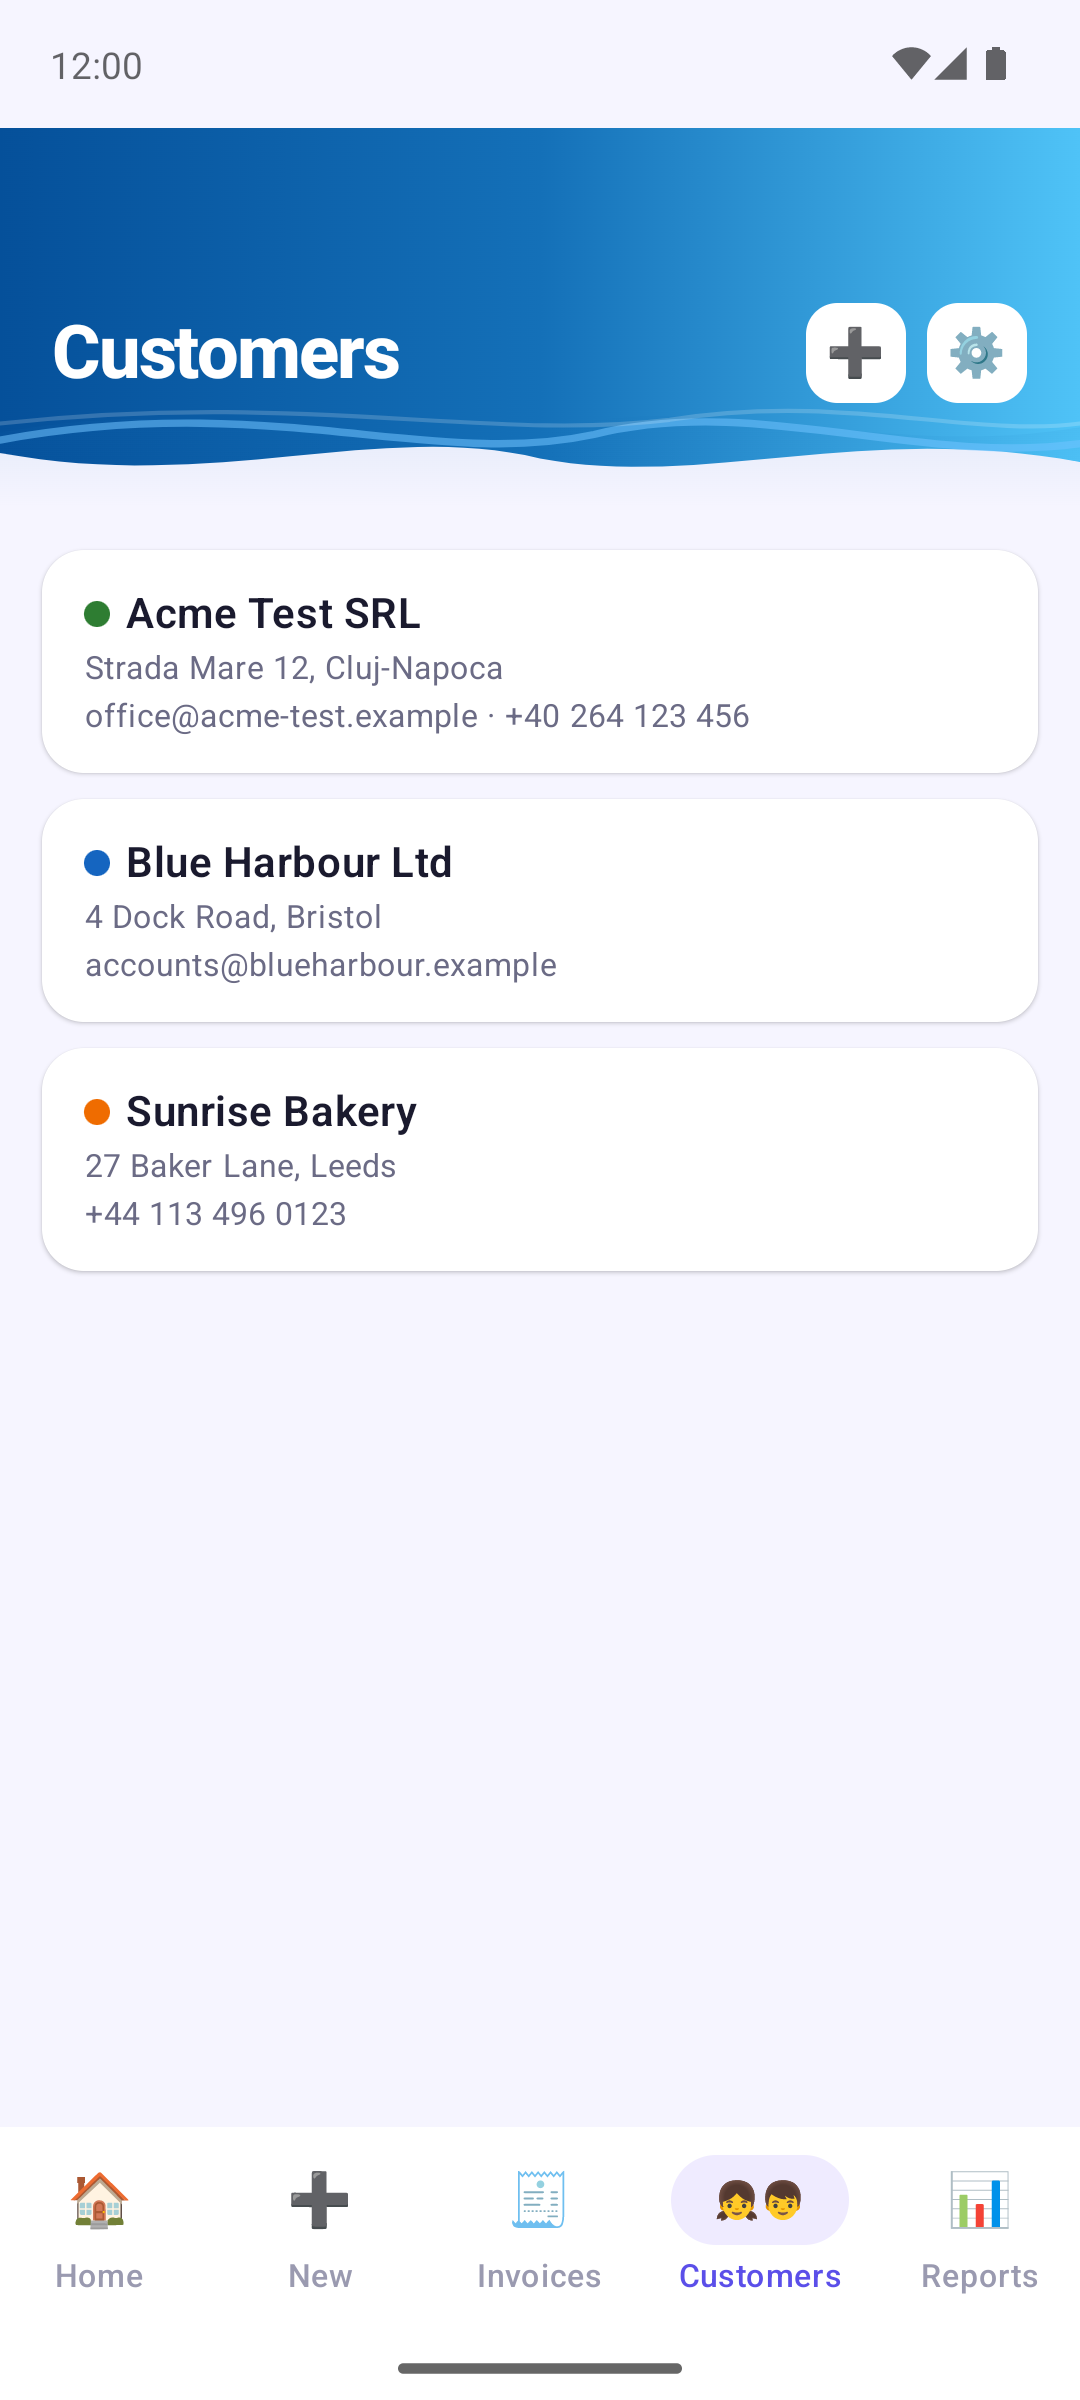
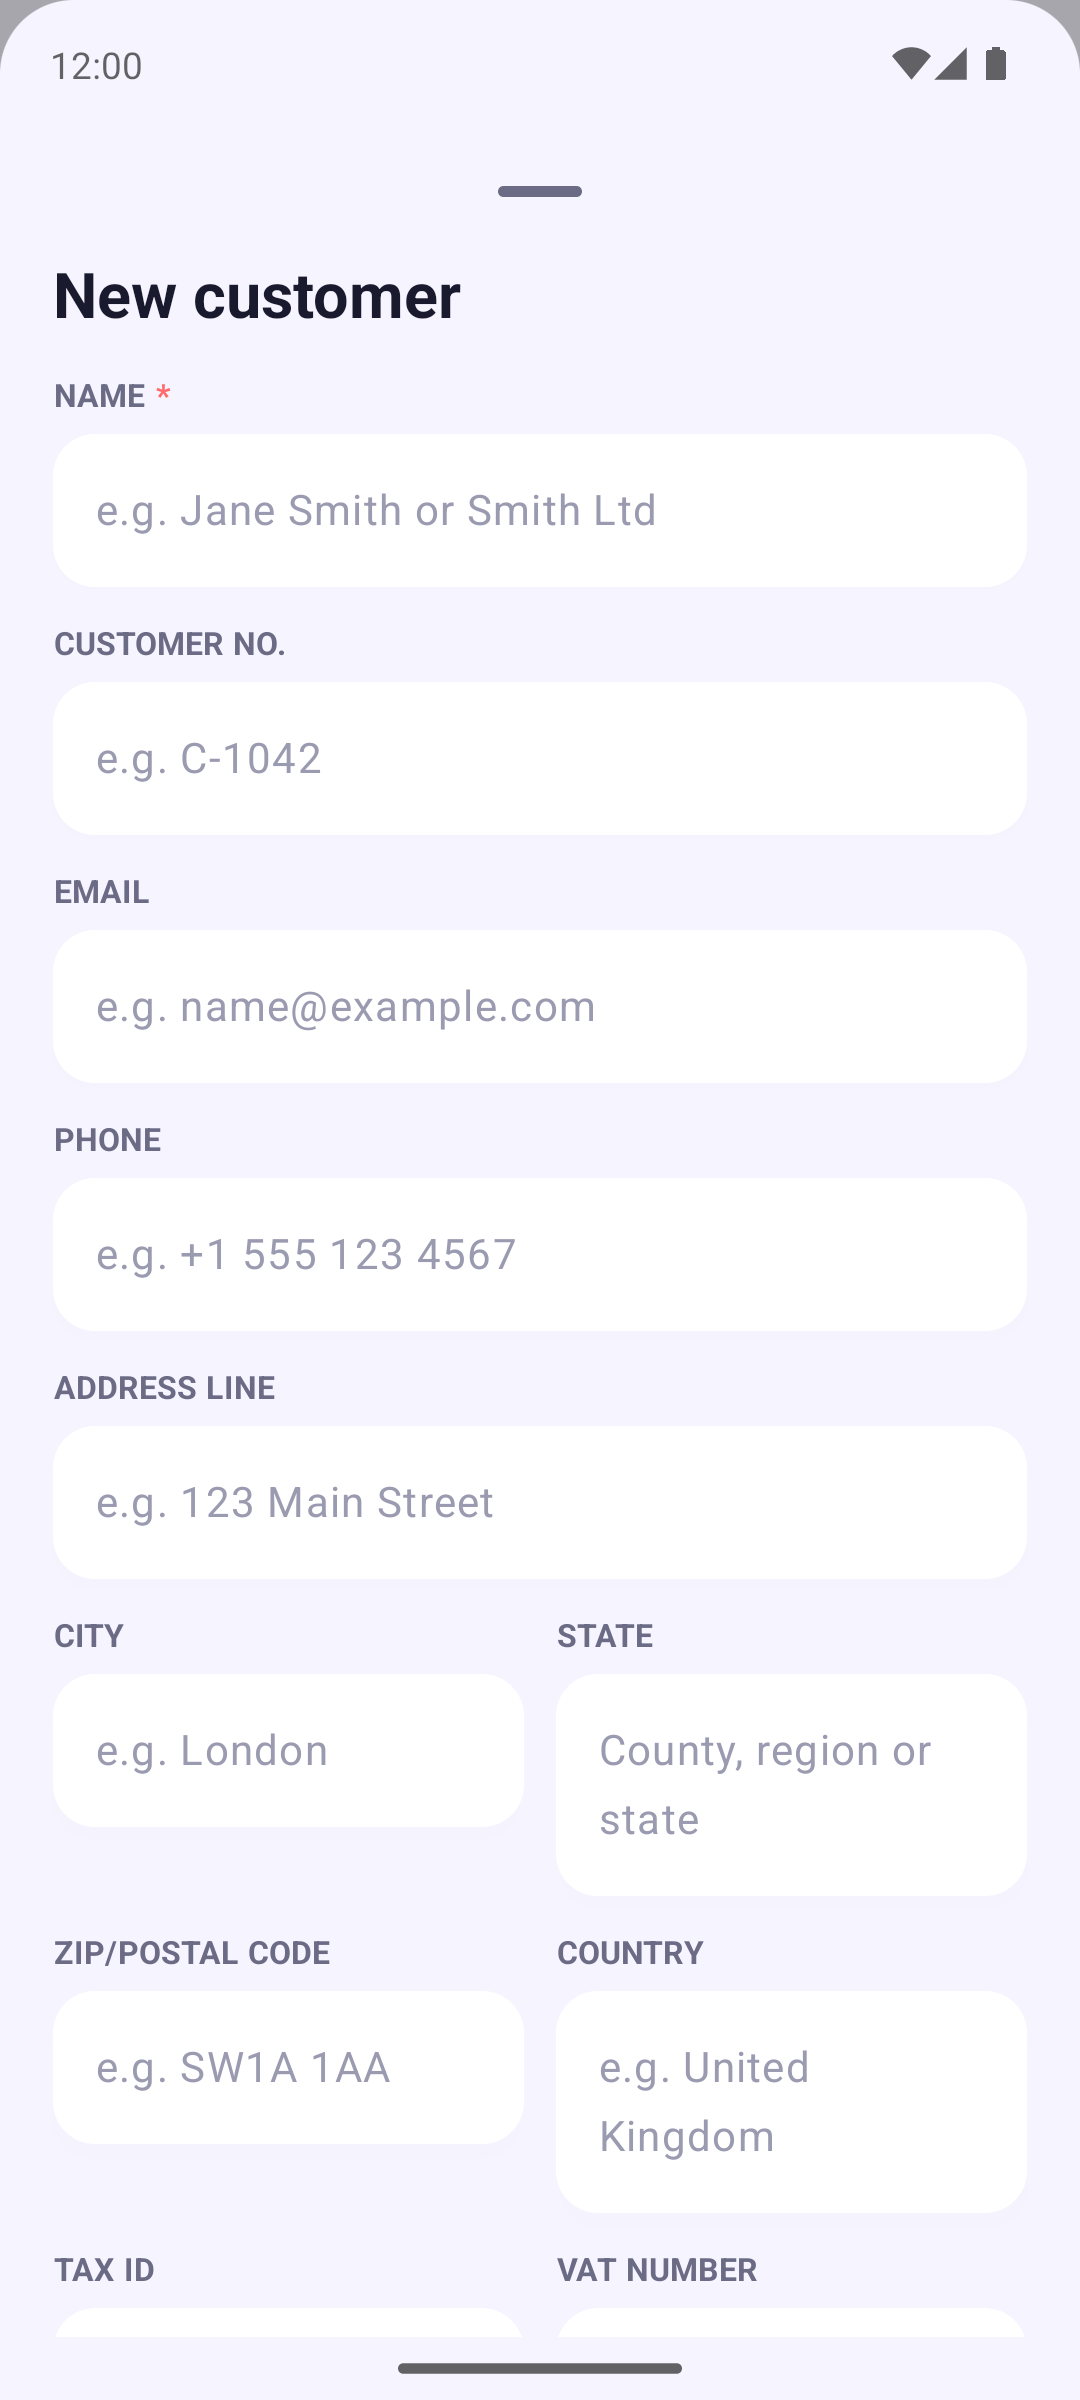
To add a customer, head to the Customers tab and tap the + icon, or use the New Customer tile. You can also add one while creating an invoice or quote. Only a name is required to create a customer file. Optional fields include: Customer No., Email, Phone, the address, Tax ID, VAT Number, Trade Register No. and a colour tint for their documents. Every field shows an example so you know what belongs there.
Tap a customer to edit them (Edit), open their history (View History: invoices, quotes and drafts) or delete them (Delete).
On your invoices and quotes, the customer's details are printed under their name in a fixed order: customer number, tax ID, VAT number, trade register number, then address, email and phone. Anything you leave empty is not printed.
3 Creating an invoice
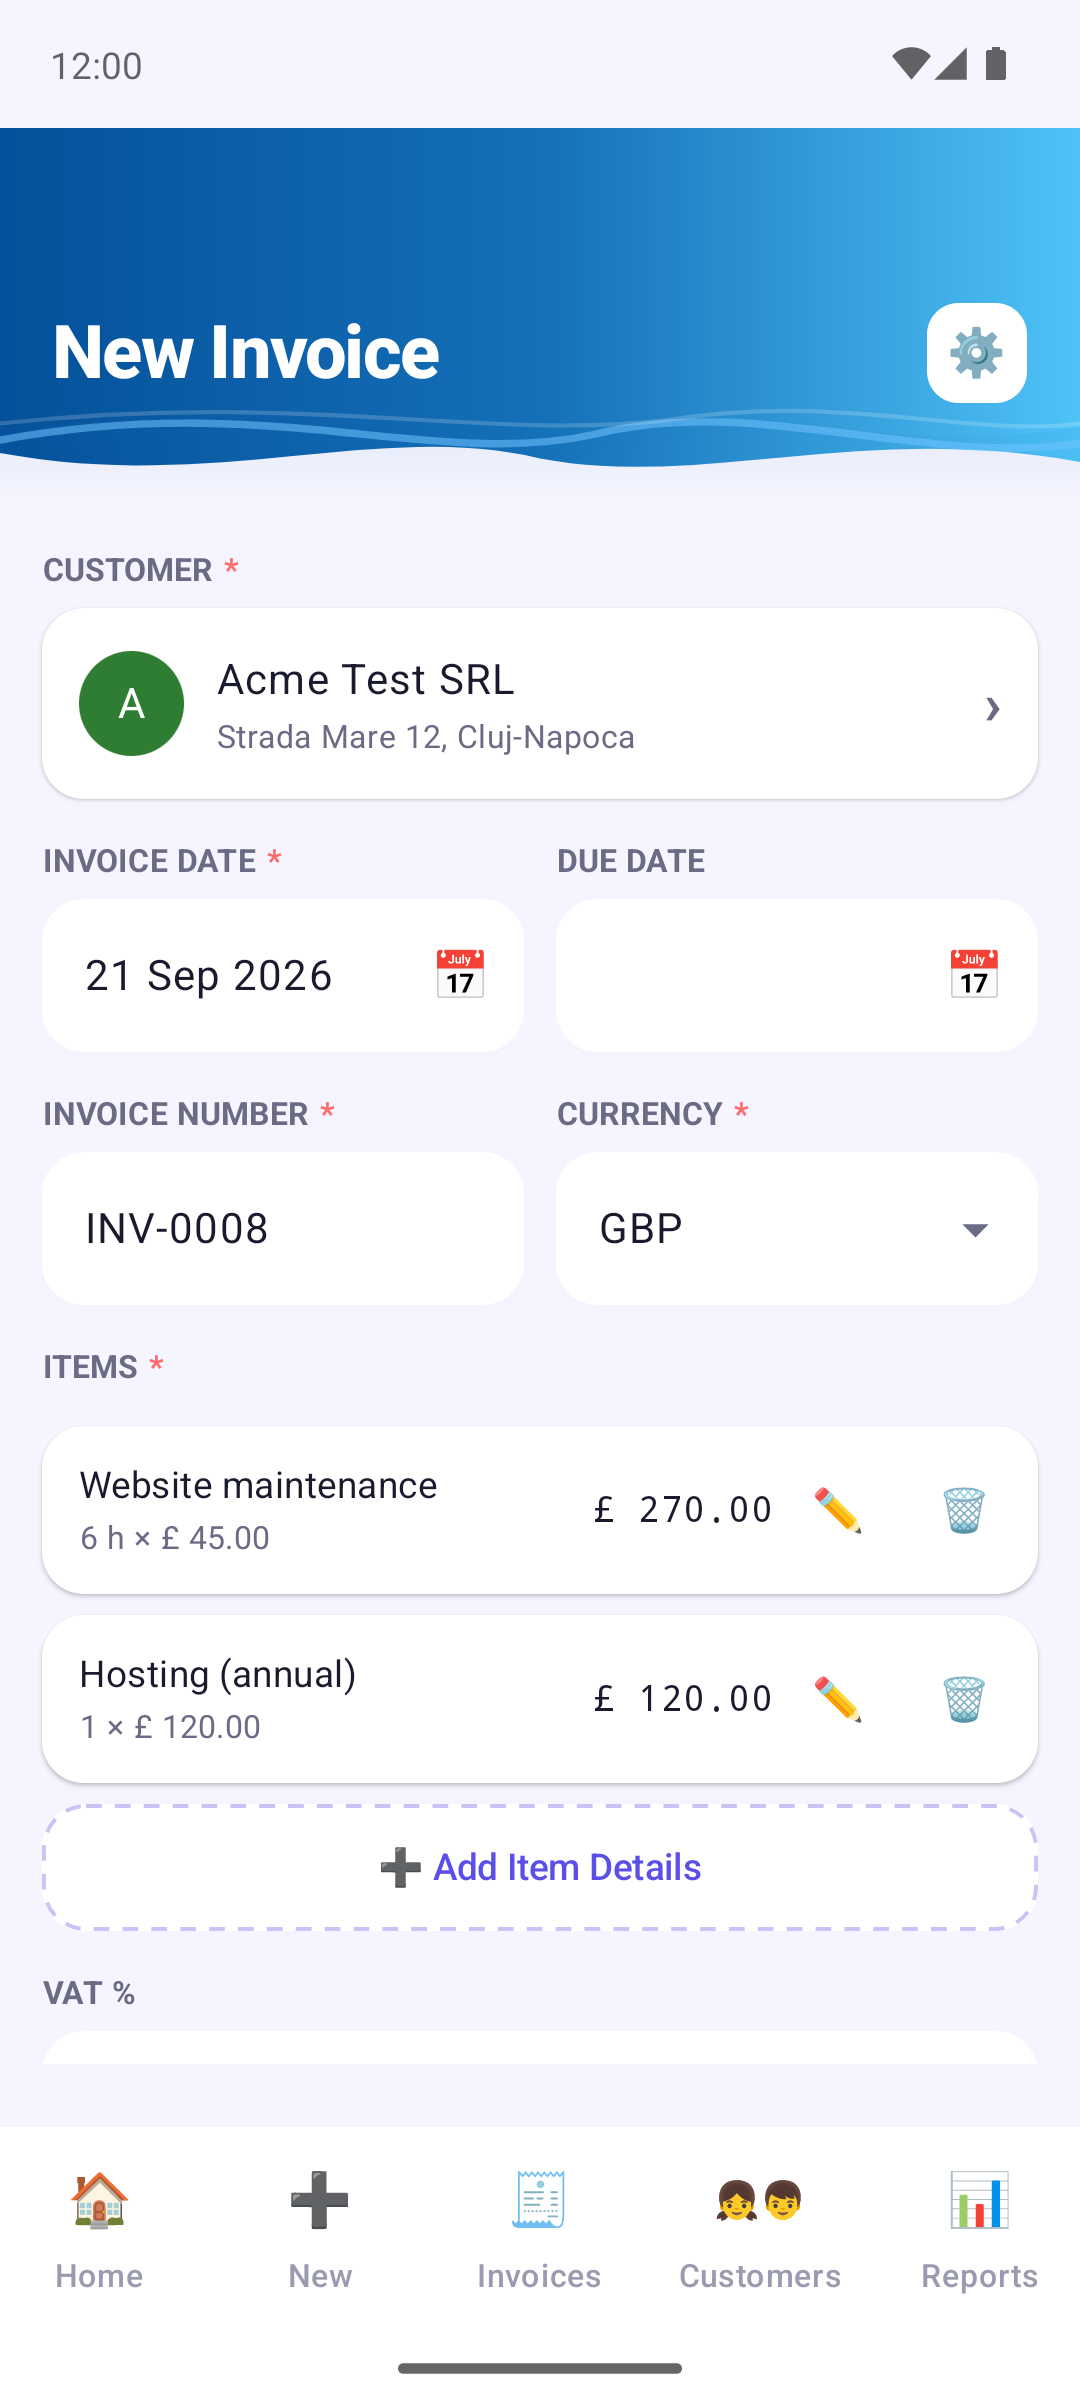
From New (or the New Invoice tile): choose a customer (or create one on the spot) and set the invoice date and due date, then add your items.
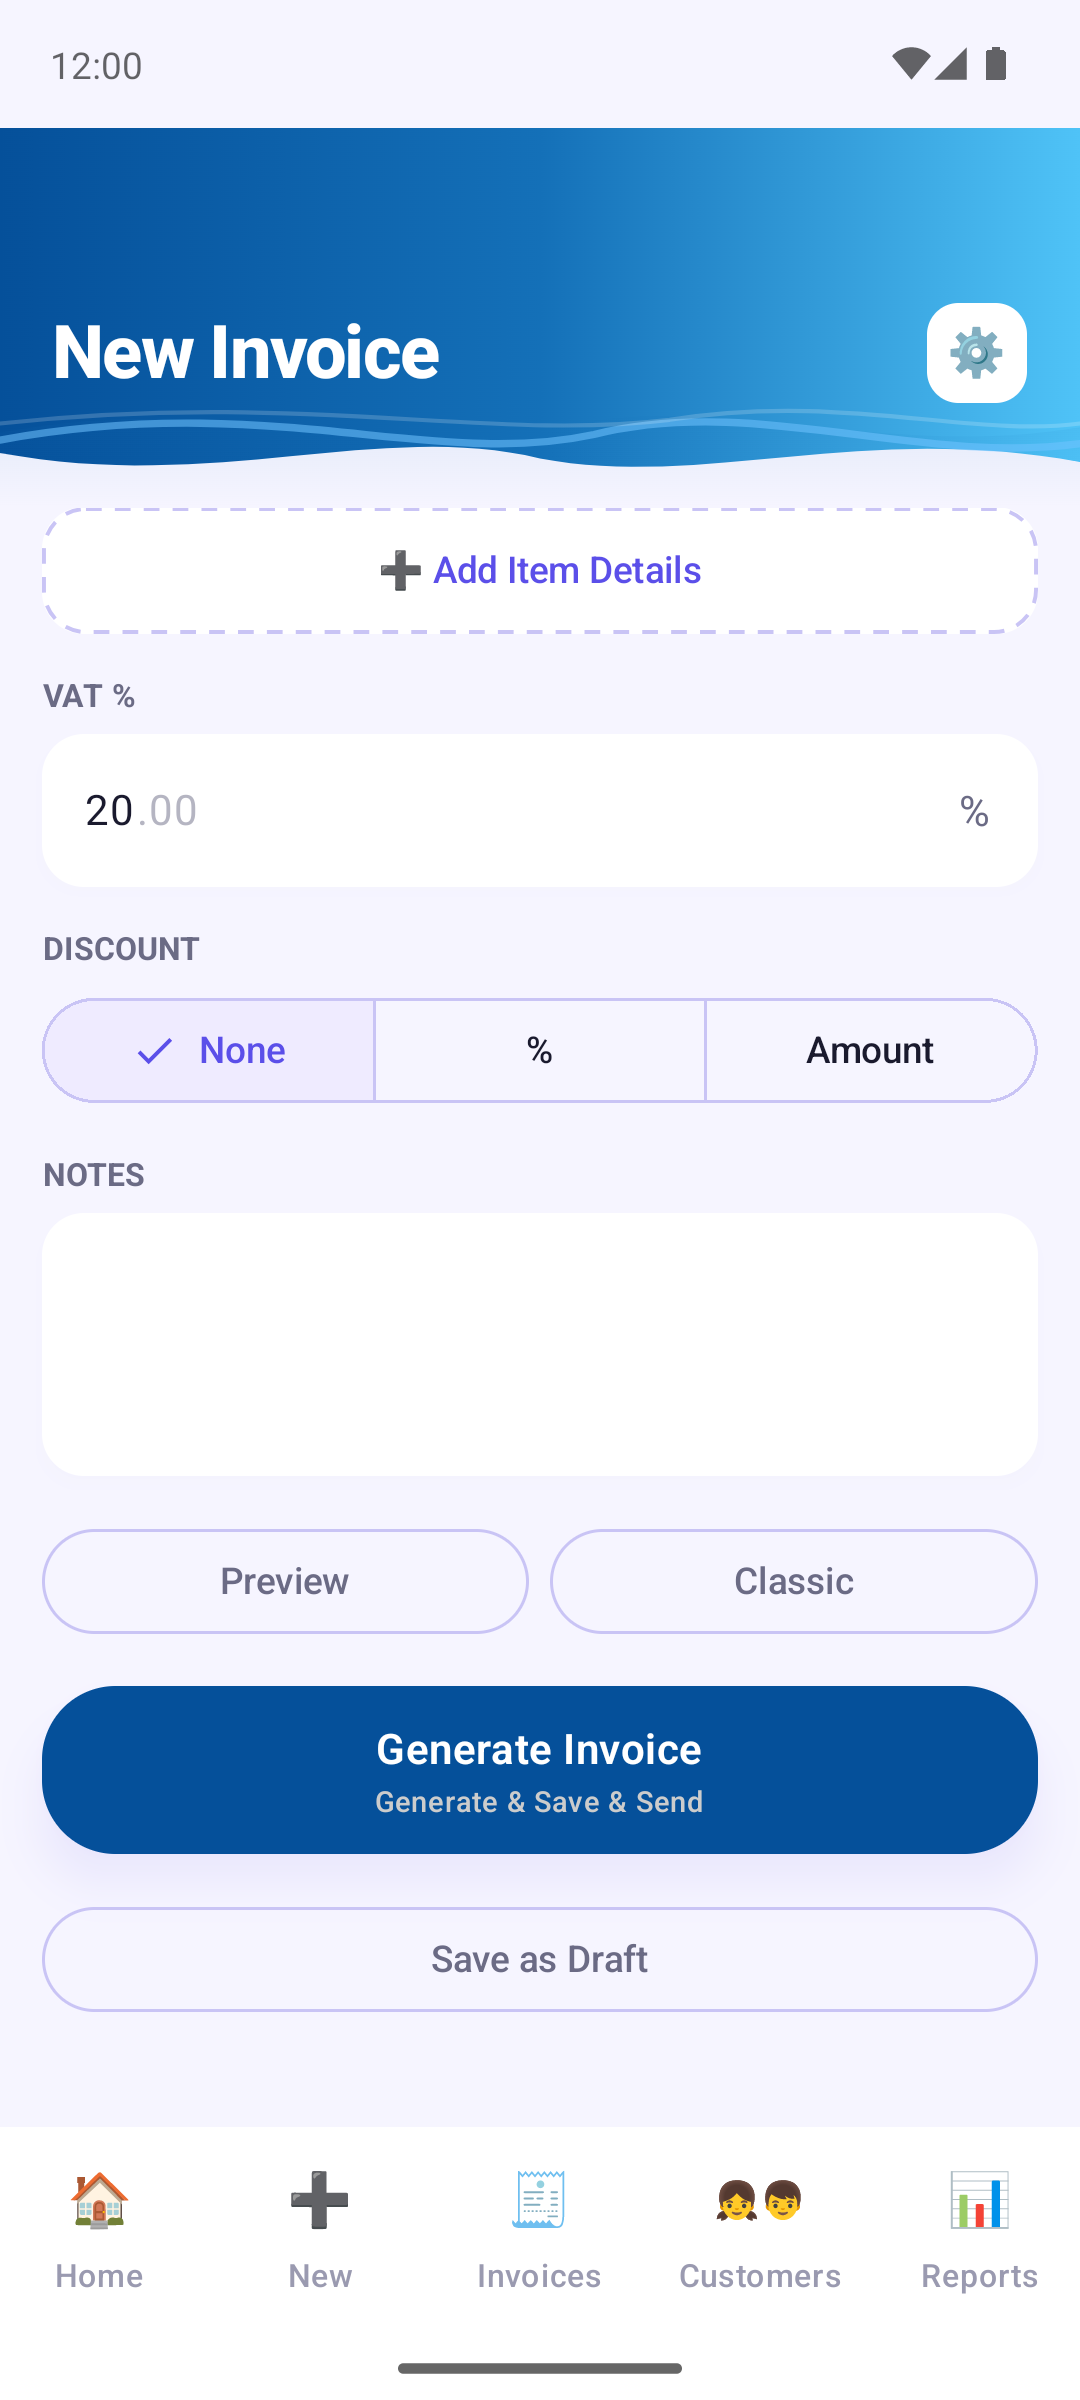
Tap Add Item Details and fill in the description, quantity, price per unit, optionally a unit (such as h, pcs or kg) and a date and time. The unit is printed next to the quantity on the PDF. Tap the pencil (✏️) on an item to correct it or the trash can (🗑️) to remove it. Descriptions and prices you used before are suggested as you type.
Then add, if necessary, a tax rate, a Discount (a percentage or a fixed amount) and Notes. The invoice number is assigned for you (with Invoice Cove Pro, this can be edited) and the currency is chosen next to it.
Preview renders a throwaway PDF so you can check how it looks — nothing is saved yet. The Template button shows which template will be used, tap it to pick a different one for this document only.
4 Drafts
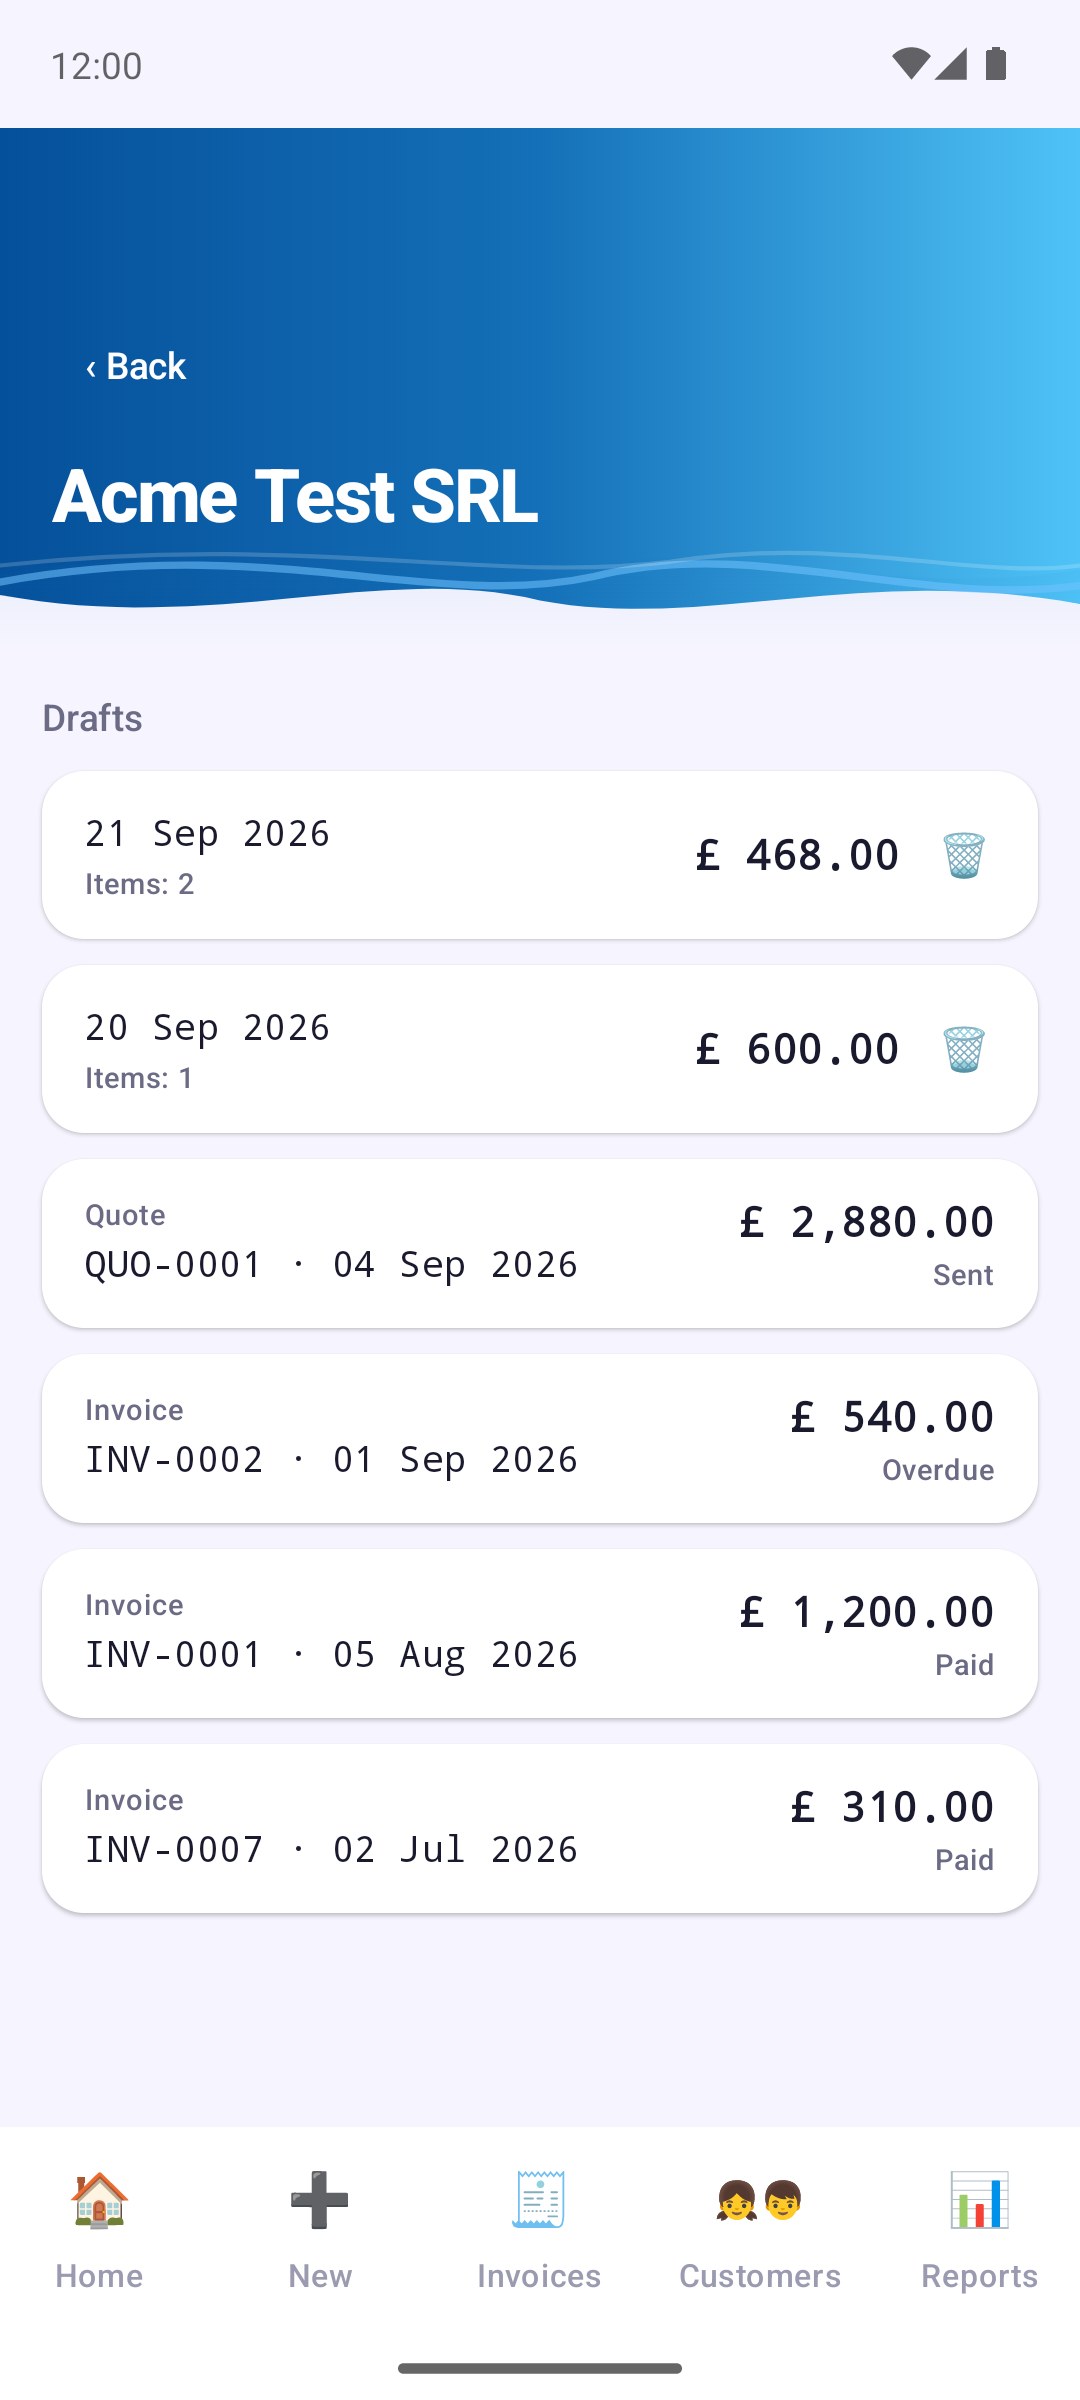
You do not lose an invoice you are still working on. As soon as you have chosen a customer and added at least one item or a note, Invoice Cove keeps a draft and updates it a moment after you stop typing and once more when you leave the app. There is no "discard changes?" question when you leave the screen; a short message tells you the draft was saved.
Tap Save as Draft (under Generate Invoice) to set the invoice aside on purpose: it is saved and the form is cleared, ready for the next invoice. This works as soon as a customer is chosen, even before you add items.
Find your drafts under Customers → the customer → View History → Drafts. Each draft shows when it was last edited, how many items it has and the total. Tap it to keep editing or to generate the invoice; tap the trash can to delete it.
- A draft never uses an invoice number and does not count toward the free monthly limit. The number is only assigned when you generate the final invoice — the draft is then replaced by it.
- A draft keeps the invoice date and due date only if you picked them yourself; otherwise it uses today's date when you reopen it.
- Deleting a customer also deletes their drafts (Invoice Cove will ask first). Drafts are included in a backup.
- Drafts are available for invoices; quotes do not have them.
5 Managing invoices
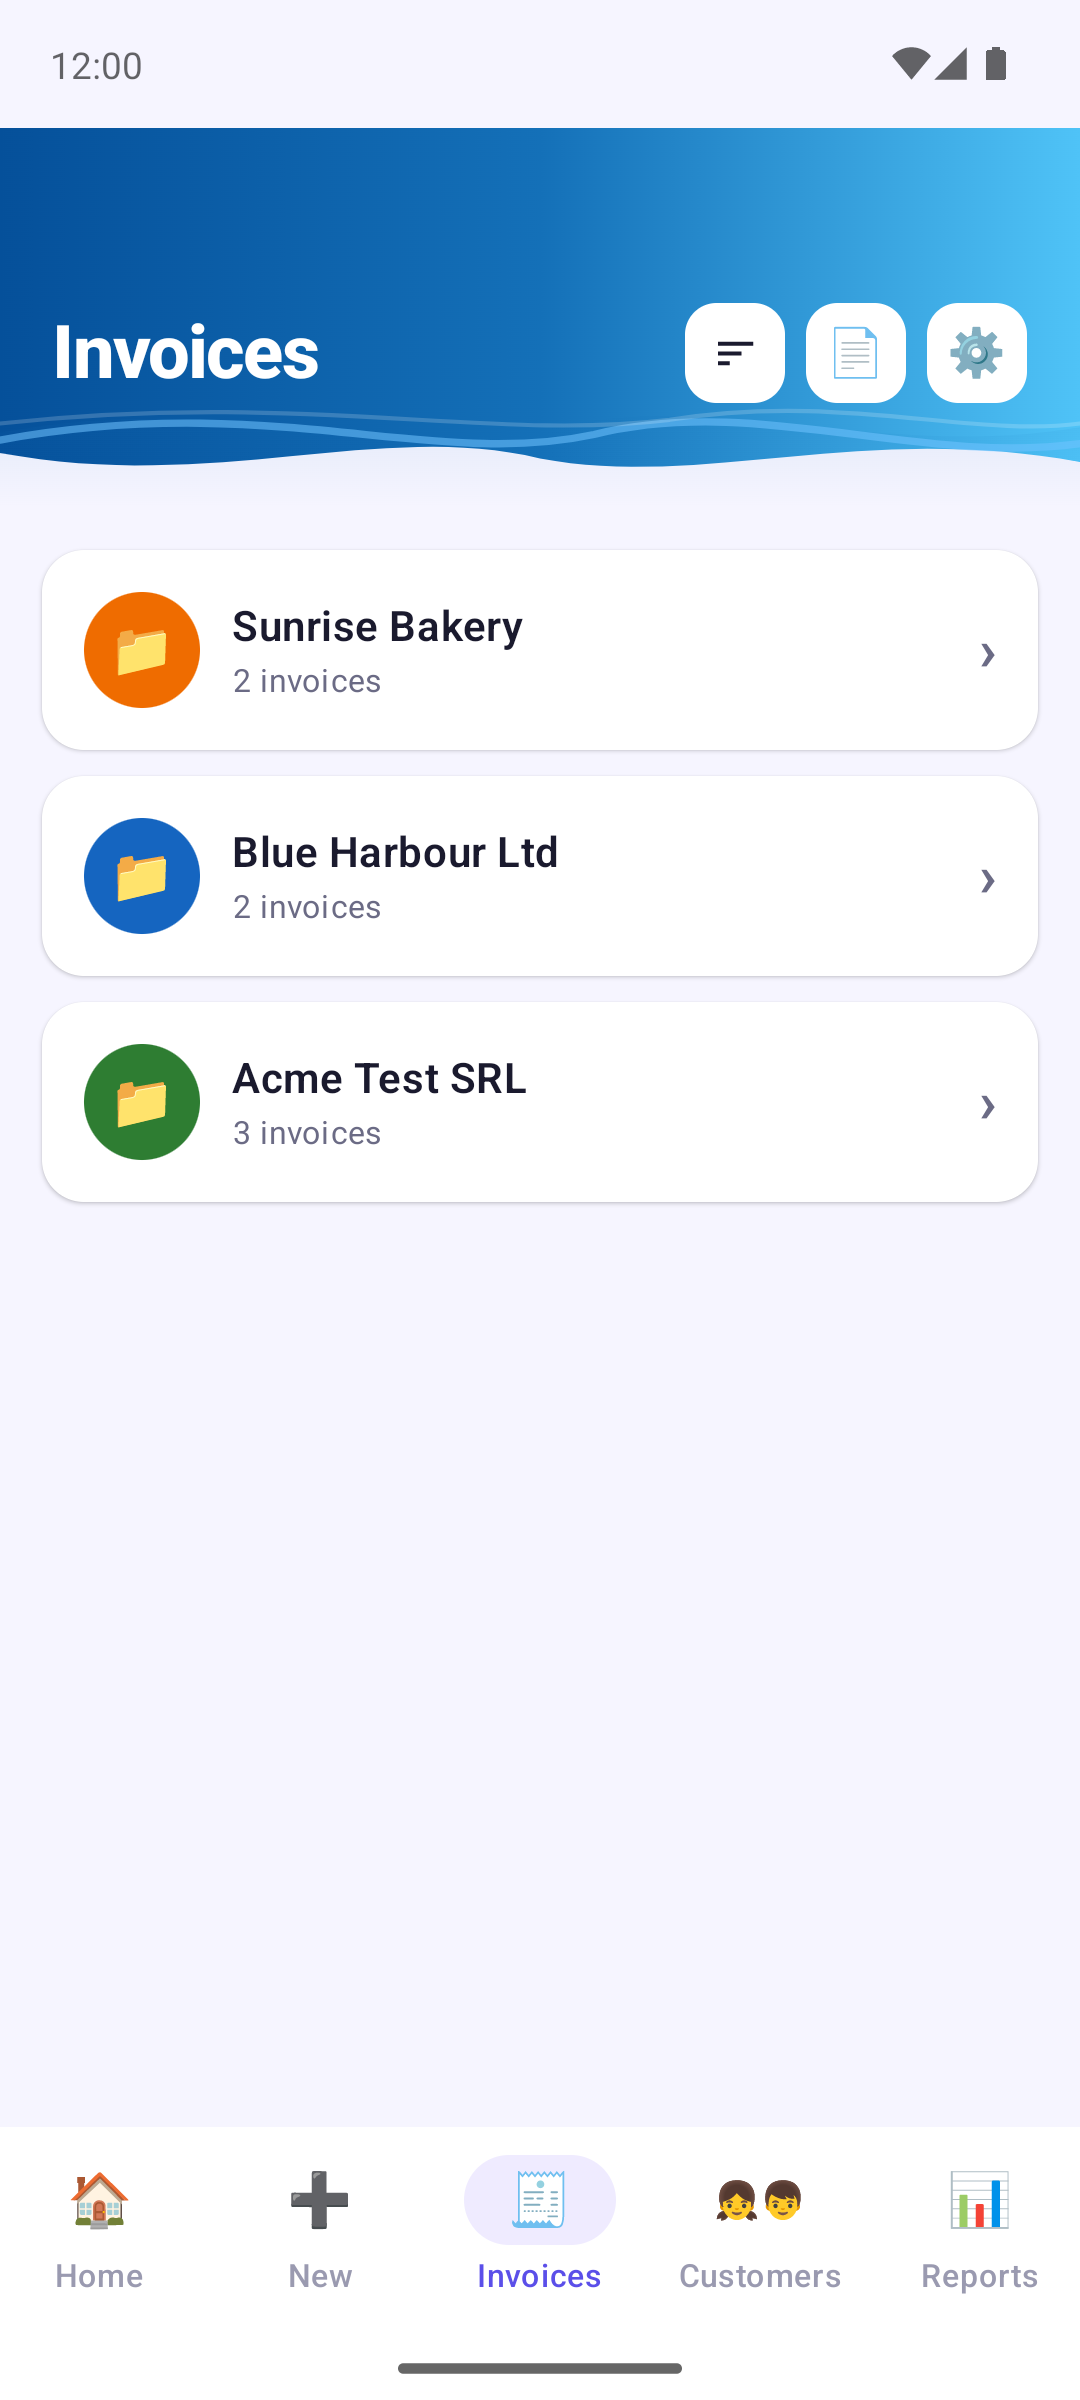
The Invoices tab groups your invoices into a folder per customer, which you can sort by Last Invoiced, Alphabetical or Number of Invoices. Open a folder to see its invoices, sorted by date, value, number or status.
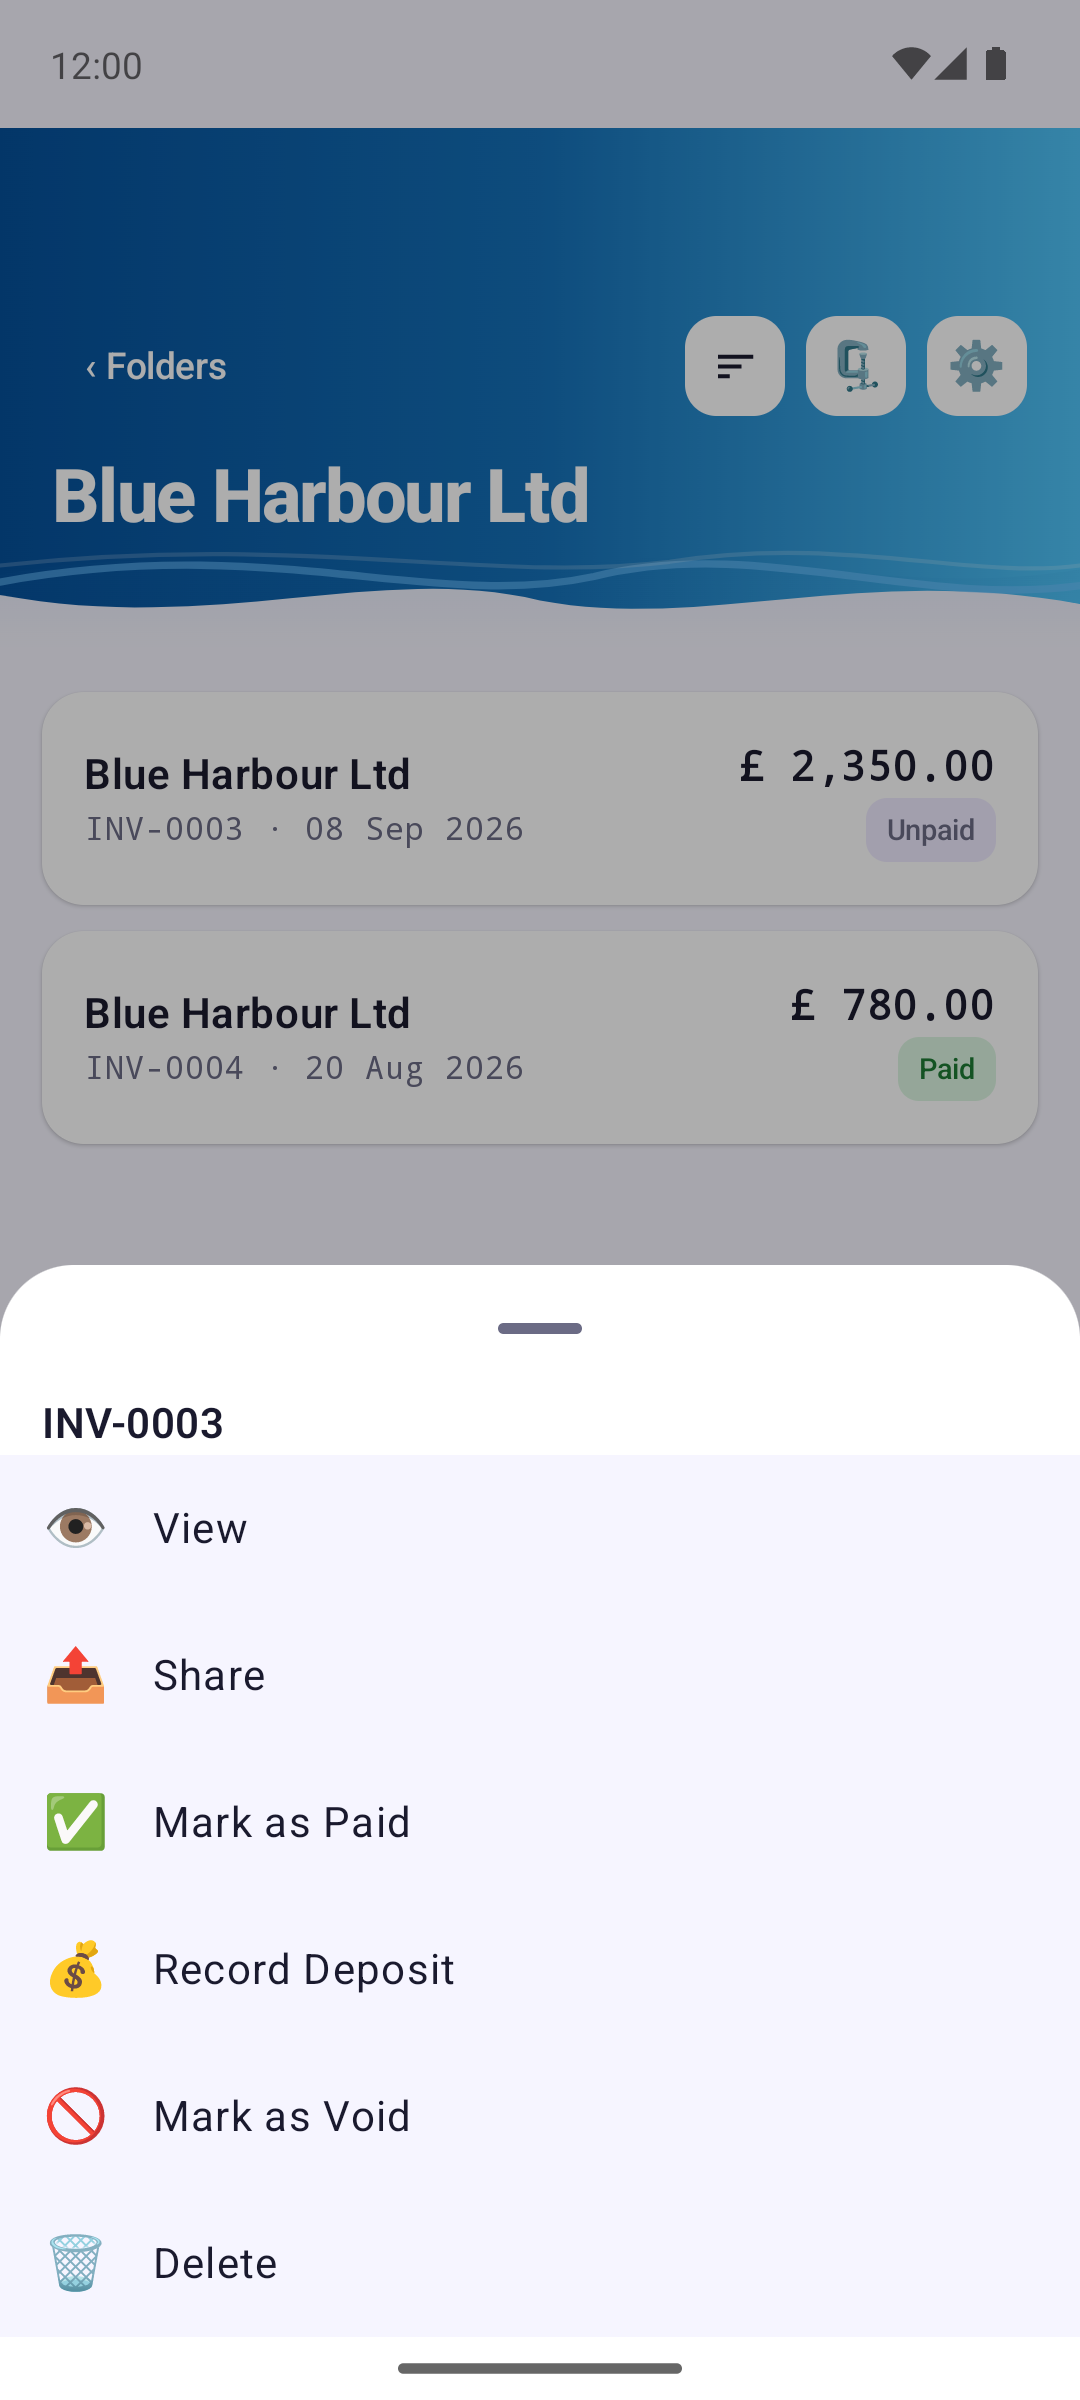
Every invoice has a status: Unpaid, Overdue (past its due date), Partially Paid (a deposit was recorded), Paid or Void. Tap an invoice to View it, Share it again, mark it paid or void, or delete it.
- Mark as Paid asks for the payment date and how it was paid (bank transfer, cash, card, PayPal or other). Once an invoice is paid it cannot be set back to unpaid.
- Record Deposit notes an advance payment. The invoice then shows as Partially Paid, and the deposit cannot be more than the total.
- Mark as Void keeps the invoice on record but marks it as cancelled. This is preferred to deleting, a deleted invoice cannot be recovered.
With Pro, a customer's folder can also be saved or shared as a ZIP of PDFs, the whole list exported for your accountant — see Exporting invoices.
6 Exporting invoices (Excel, CSV, ZIP)
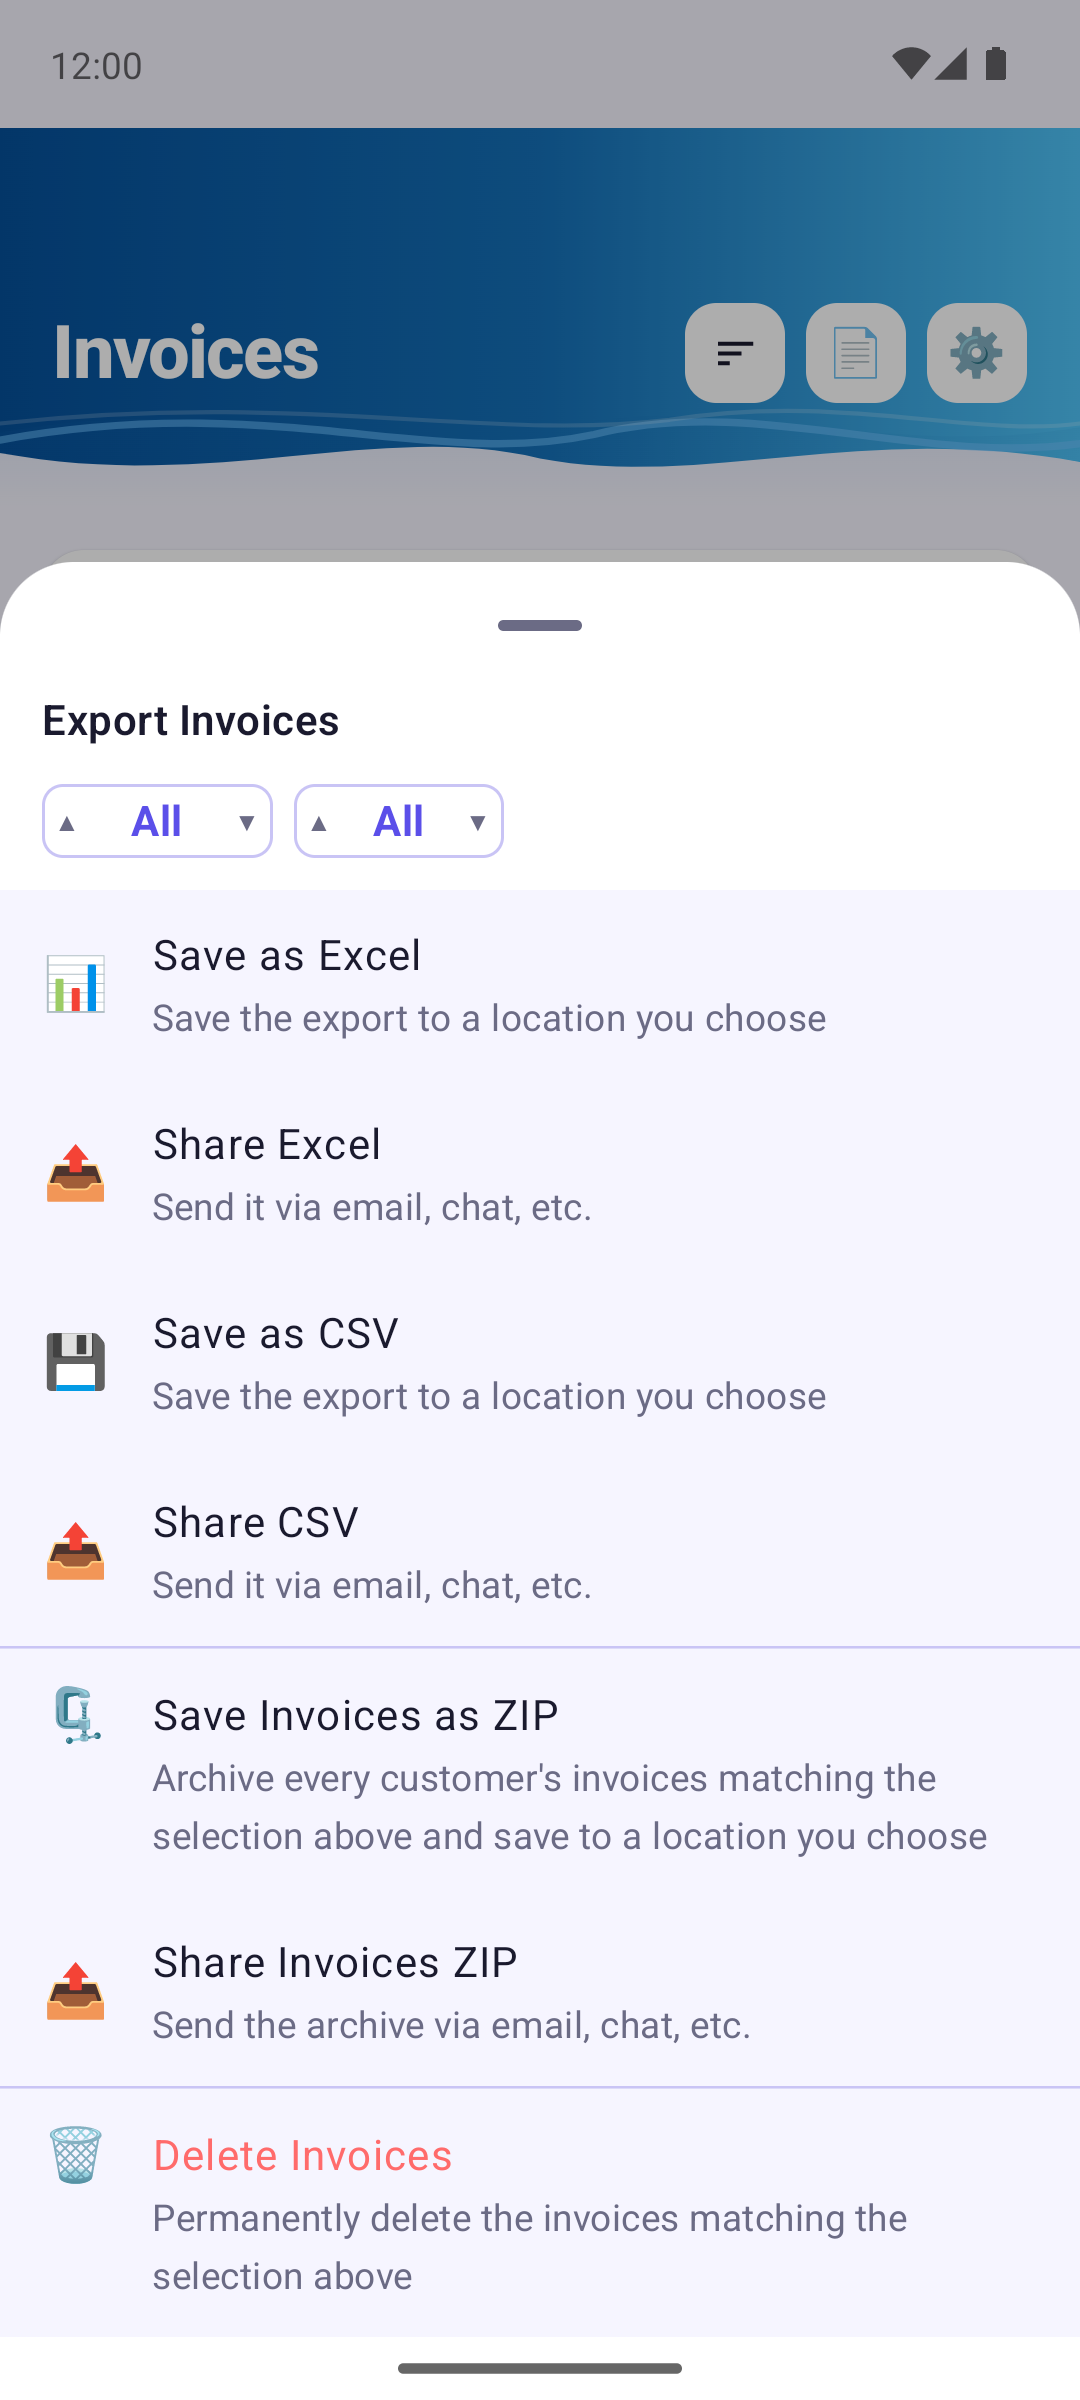
Available with Invoice Cove Pro. Tap the export icon (📄) at the top of the Invoices tab. Choose which invoices to include with the year and month pickers (All, one year, or one month of a year; only years and months that have invoices are offered), then pick what to do:
- Save as Excel / Share Excel — an Excel spreadsheet (.xlsx).
- Save as CSV / Share CSV — the same table as a CSV file.
- Save Invoices as ZIP / Share Invoices ZIP — the invoice PDFs in one ZIP, one folder per customer.
- Delete Invoices — permanently deletes the selected invoices after two confirmations.
Save lets you choose where on your device the file goes; Share opens Android's share sheet so you can email it or send it in a message.
Excel and CSV are made for your accountant, the default is: one row per invoice, number and dates, customer's name, number, tax ID, VAT number, trade register number and address, the invoice's subtotal, discount, VAT rate, VAT amount and total, the currency, payment status, date and method. Column headings and fixed words (invoice, paid, unpaid, payment methods) are written in the language the app is set to.
To get one row per invoice item with the invoice details repeated on every row and each item's description, quantity, unit, price and net amount added, turn on Detailed export (one row per item).
7 Creating a quote
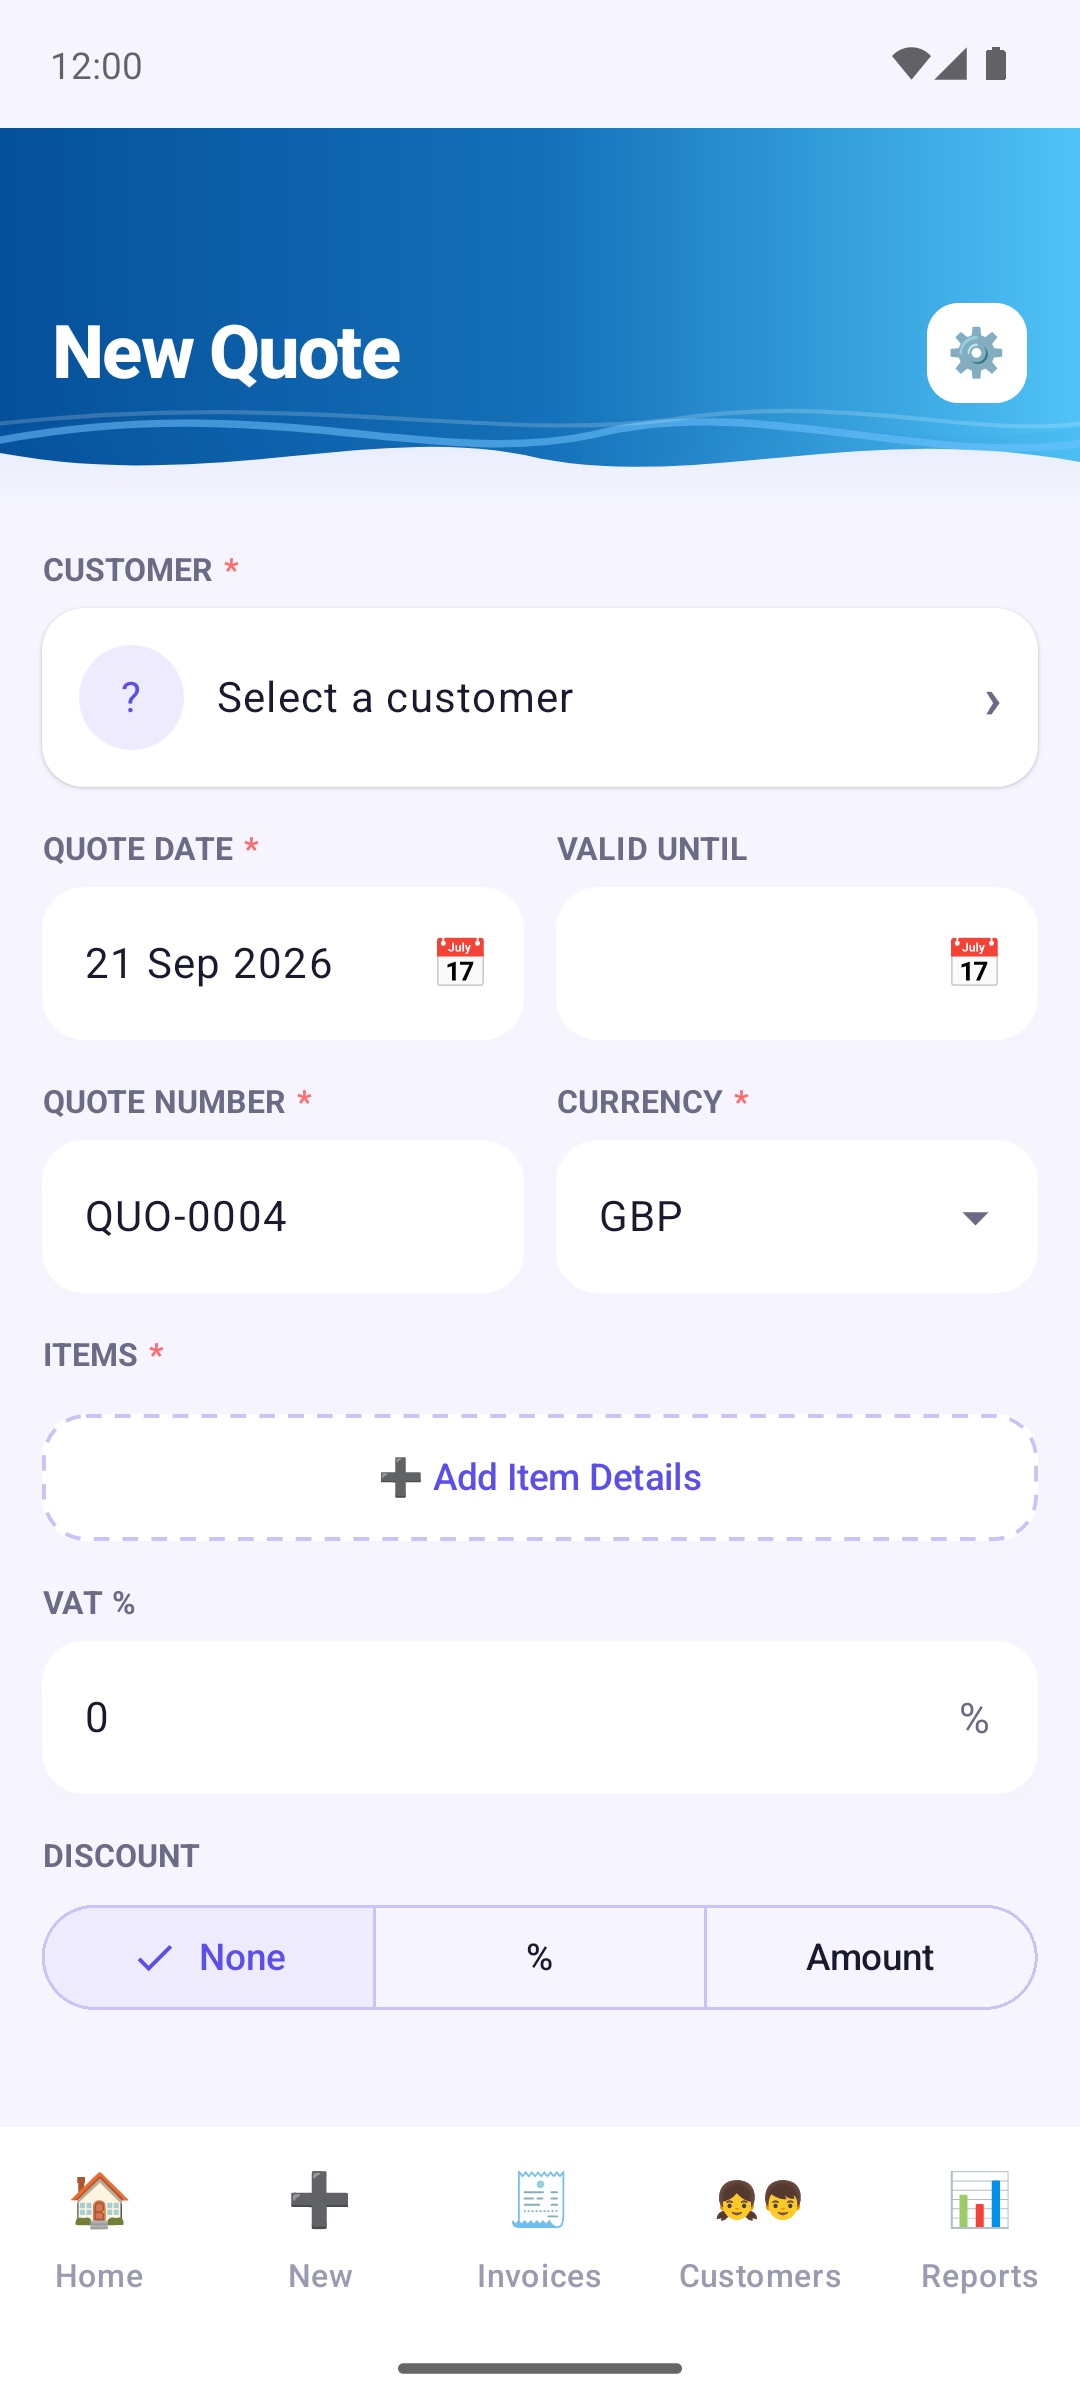
New Quote tile works like New Invoice tile, same fields, same Preview and Template buttons, same Generate Quote that saves/creates the PDF and opens the share sheet in one tap; with a Quote Date and a Valid Until date instead of an invoice date and due date.
Quotes do not have drafts.
8 Managing quotes & converting to invoice
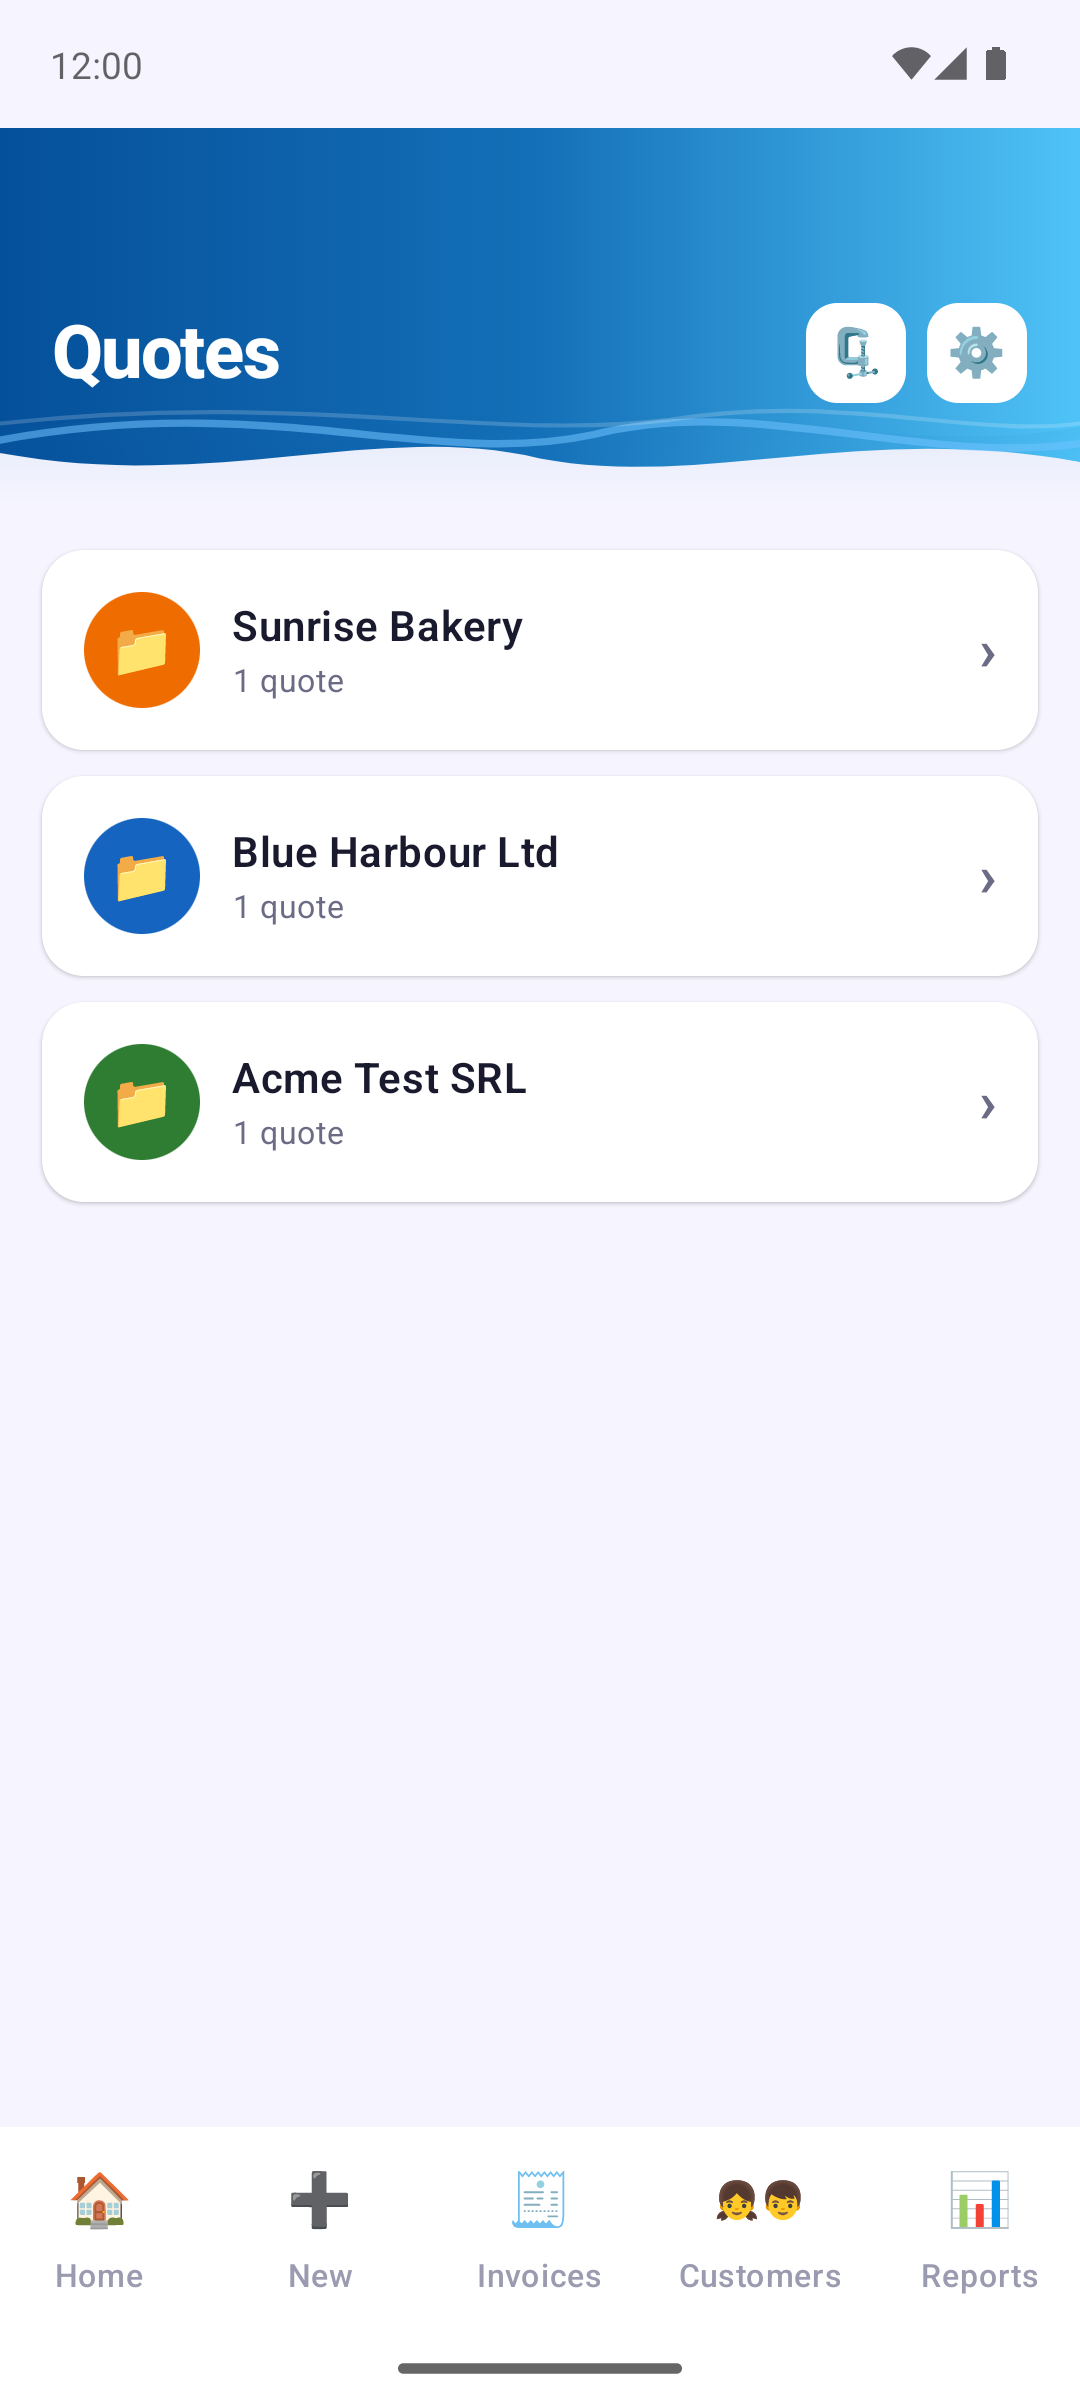
The Quotes screen (from the Home tile) lists your quotes by customer, the same way Invoices does. Open a quote to view or share it, use Accept or Decline when the customer answers, record a deposit, or delete it. The deposit cannot be more than the quote's total.
Once a customer accepts a quote, use Convert to Invoice to turn the checked line items into a real, independently editable invoice. The due date and discount can still be adjusted, the original quote is marked Converted and kept for your records.
9 Calendar & reminders
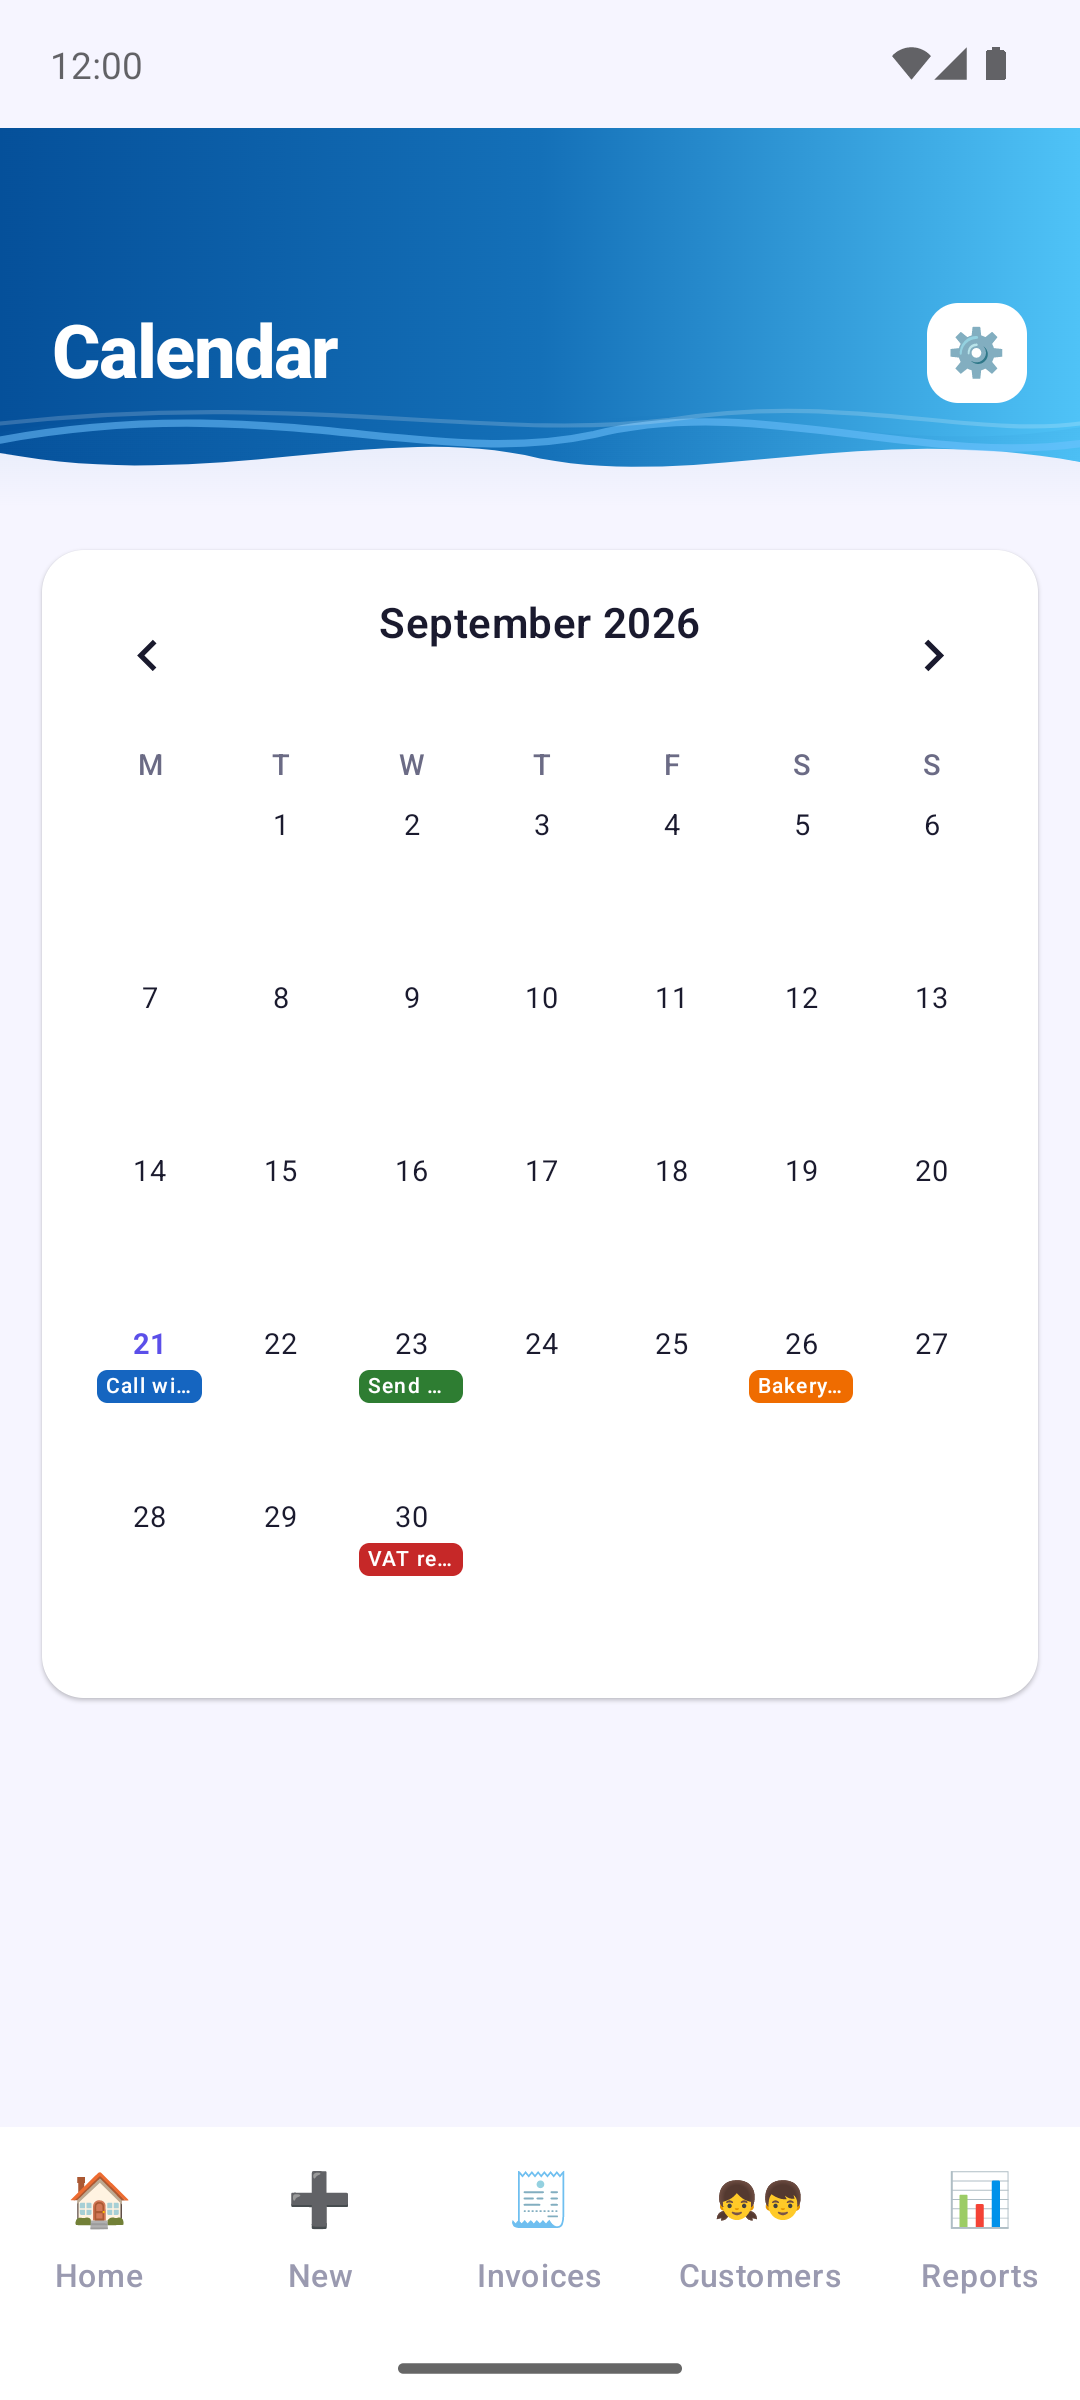
The Calendar screen is a monthly view for your own notes. Tap a day to see or add notes, notes have titles and text, with Remind me and a time it sends you a notification at the date and time set. The first day of the week follows your settings.
Separately, Invoice Cove sends payment reminders — local notifications for invoices that are due soon or overdue. Nothing is sent from or to a server.
10 Reports
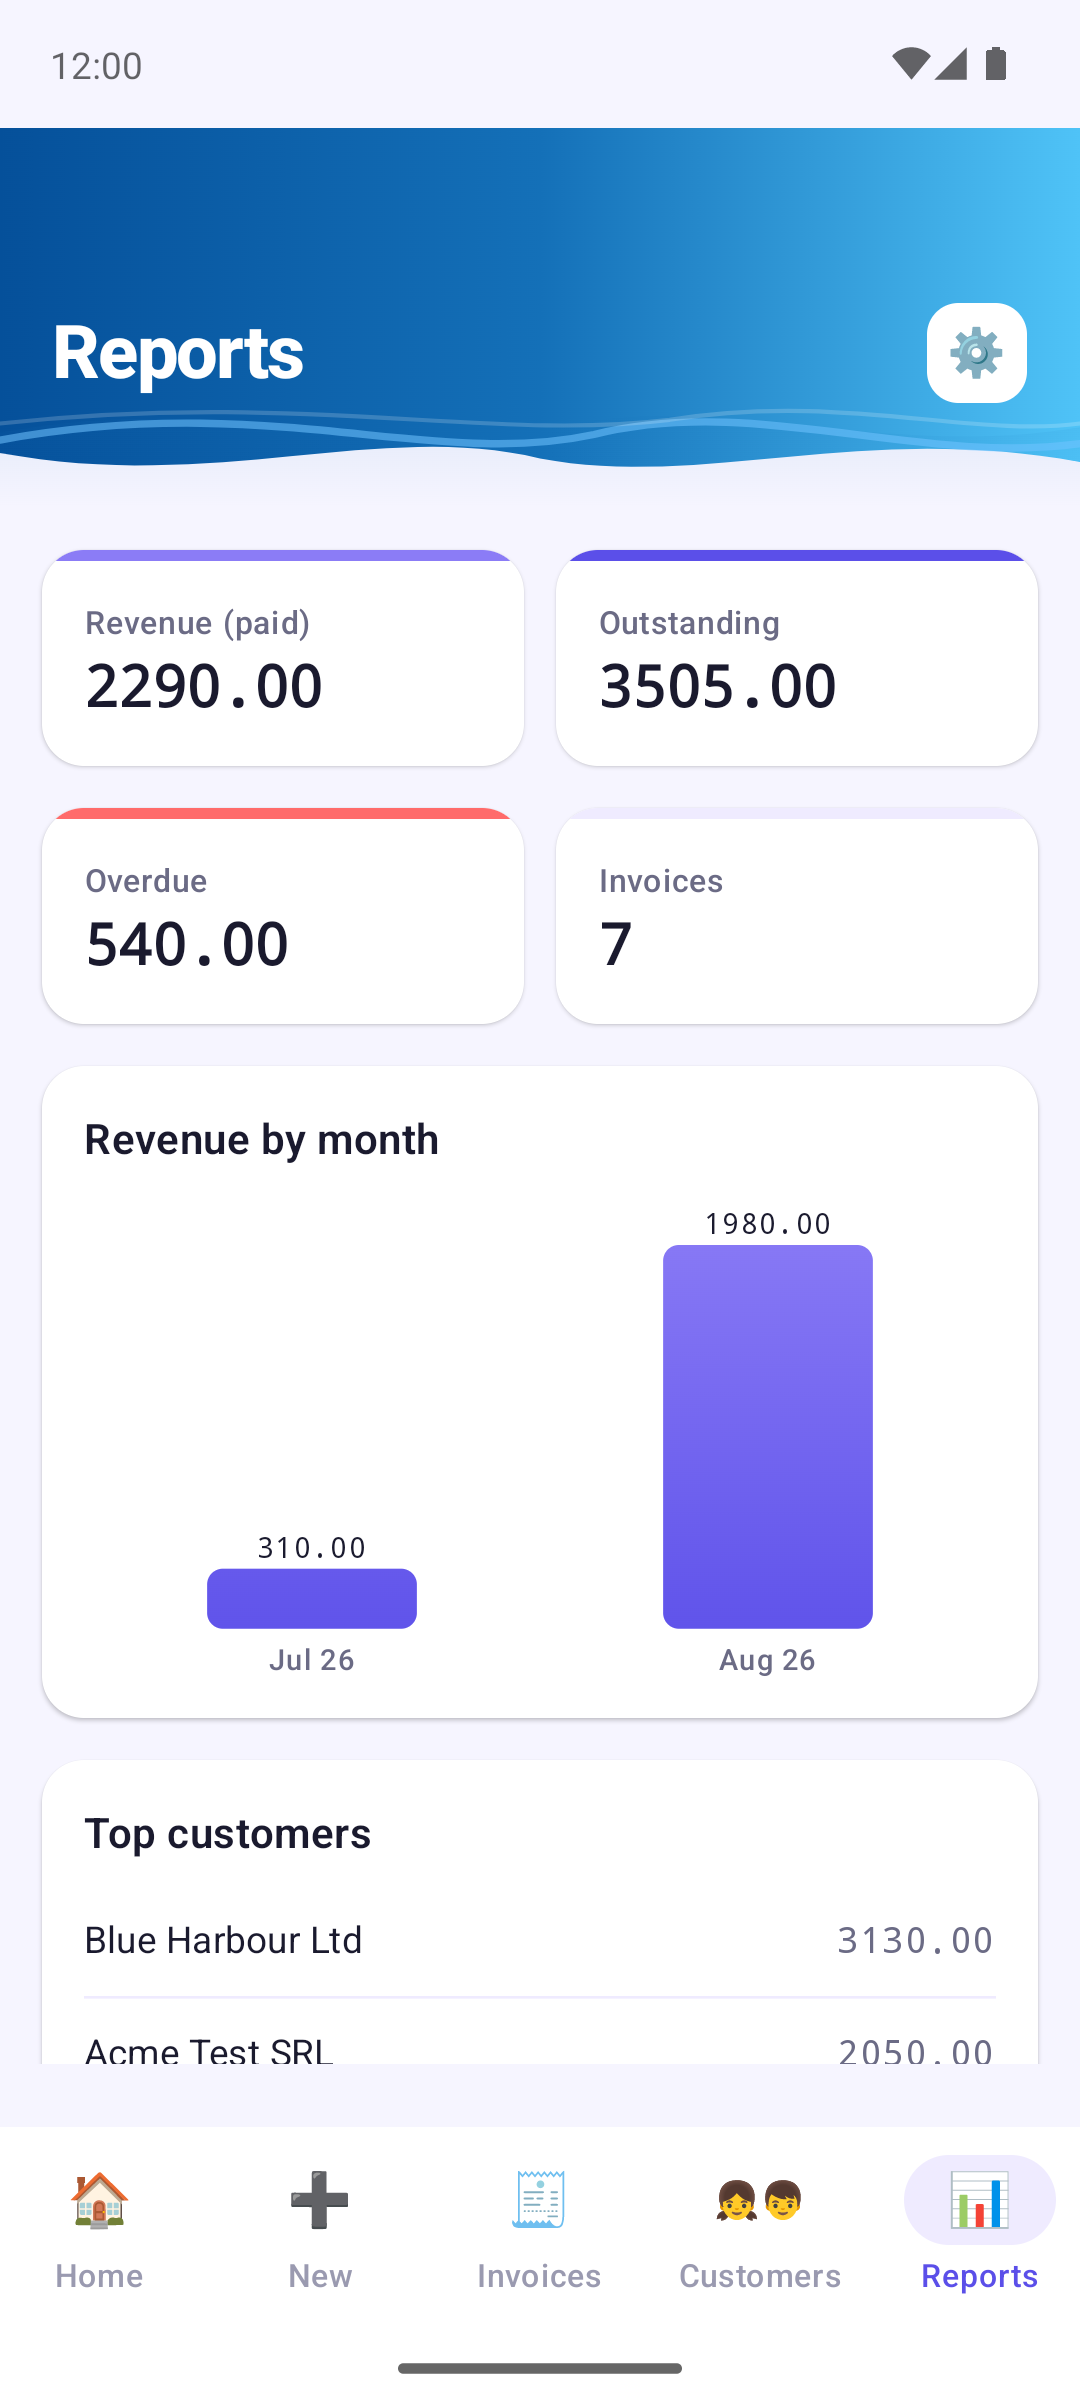
Reports gives you a quick overview of: Revenue (paid), Outstanding and Overdue amounts, how many invoices you have, Revenue by month, and your Top customers by billed total.
Tap the Outstanding or Overdue card to open the list of exactly those invoices.
11 Business details & settings
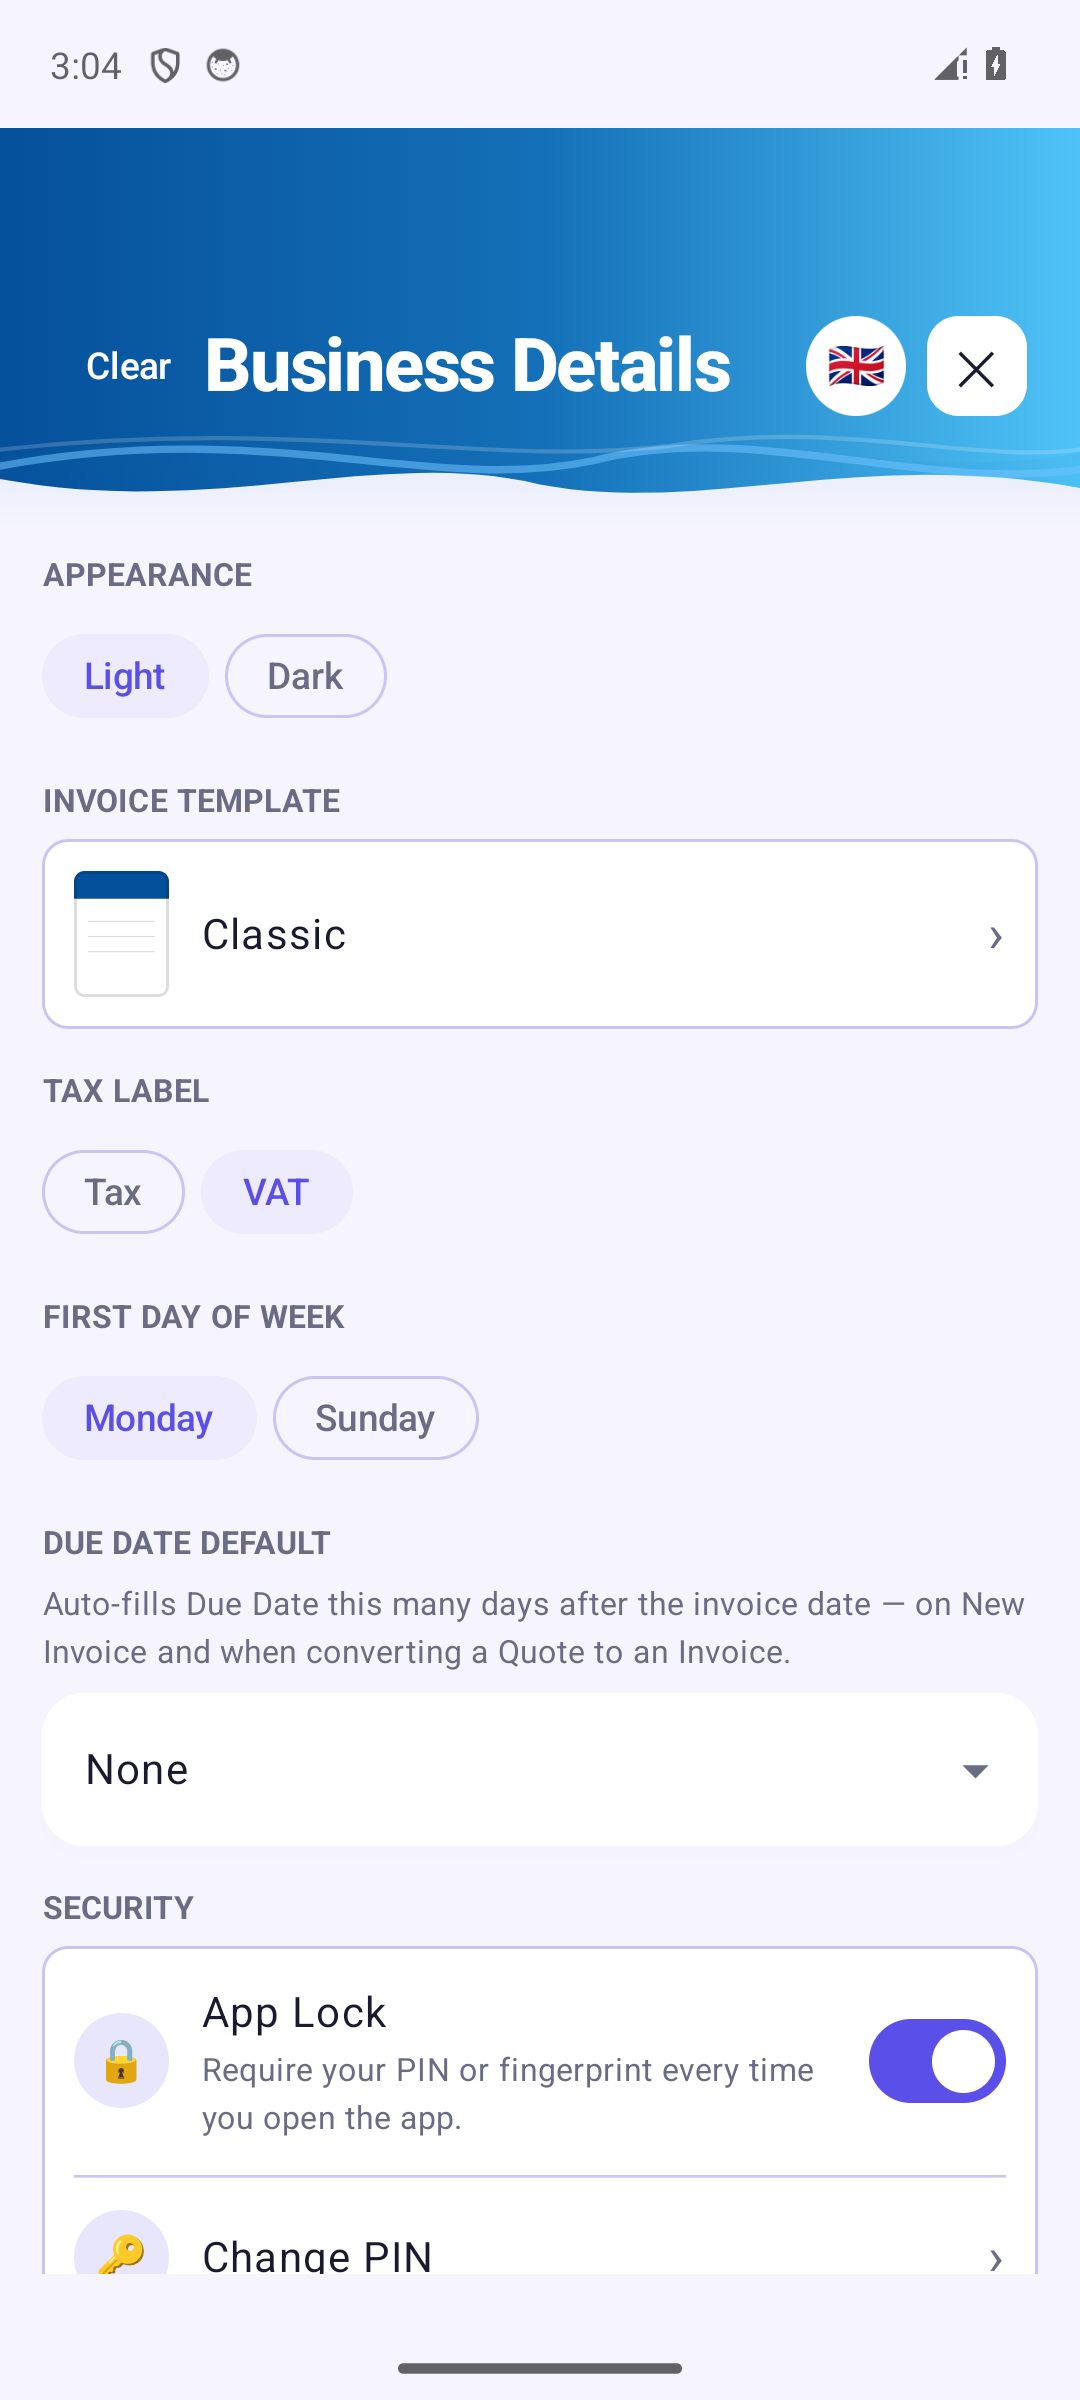
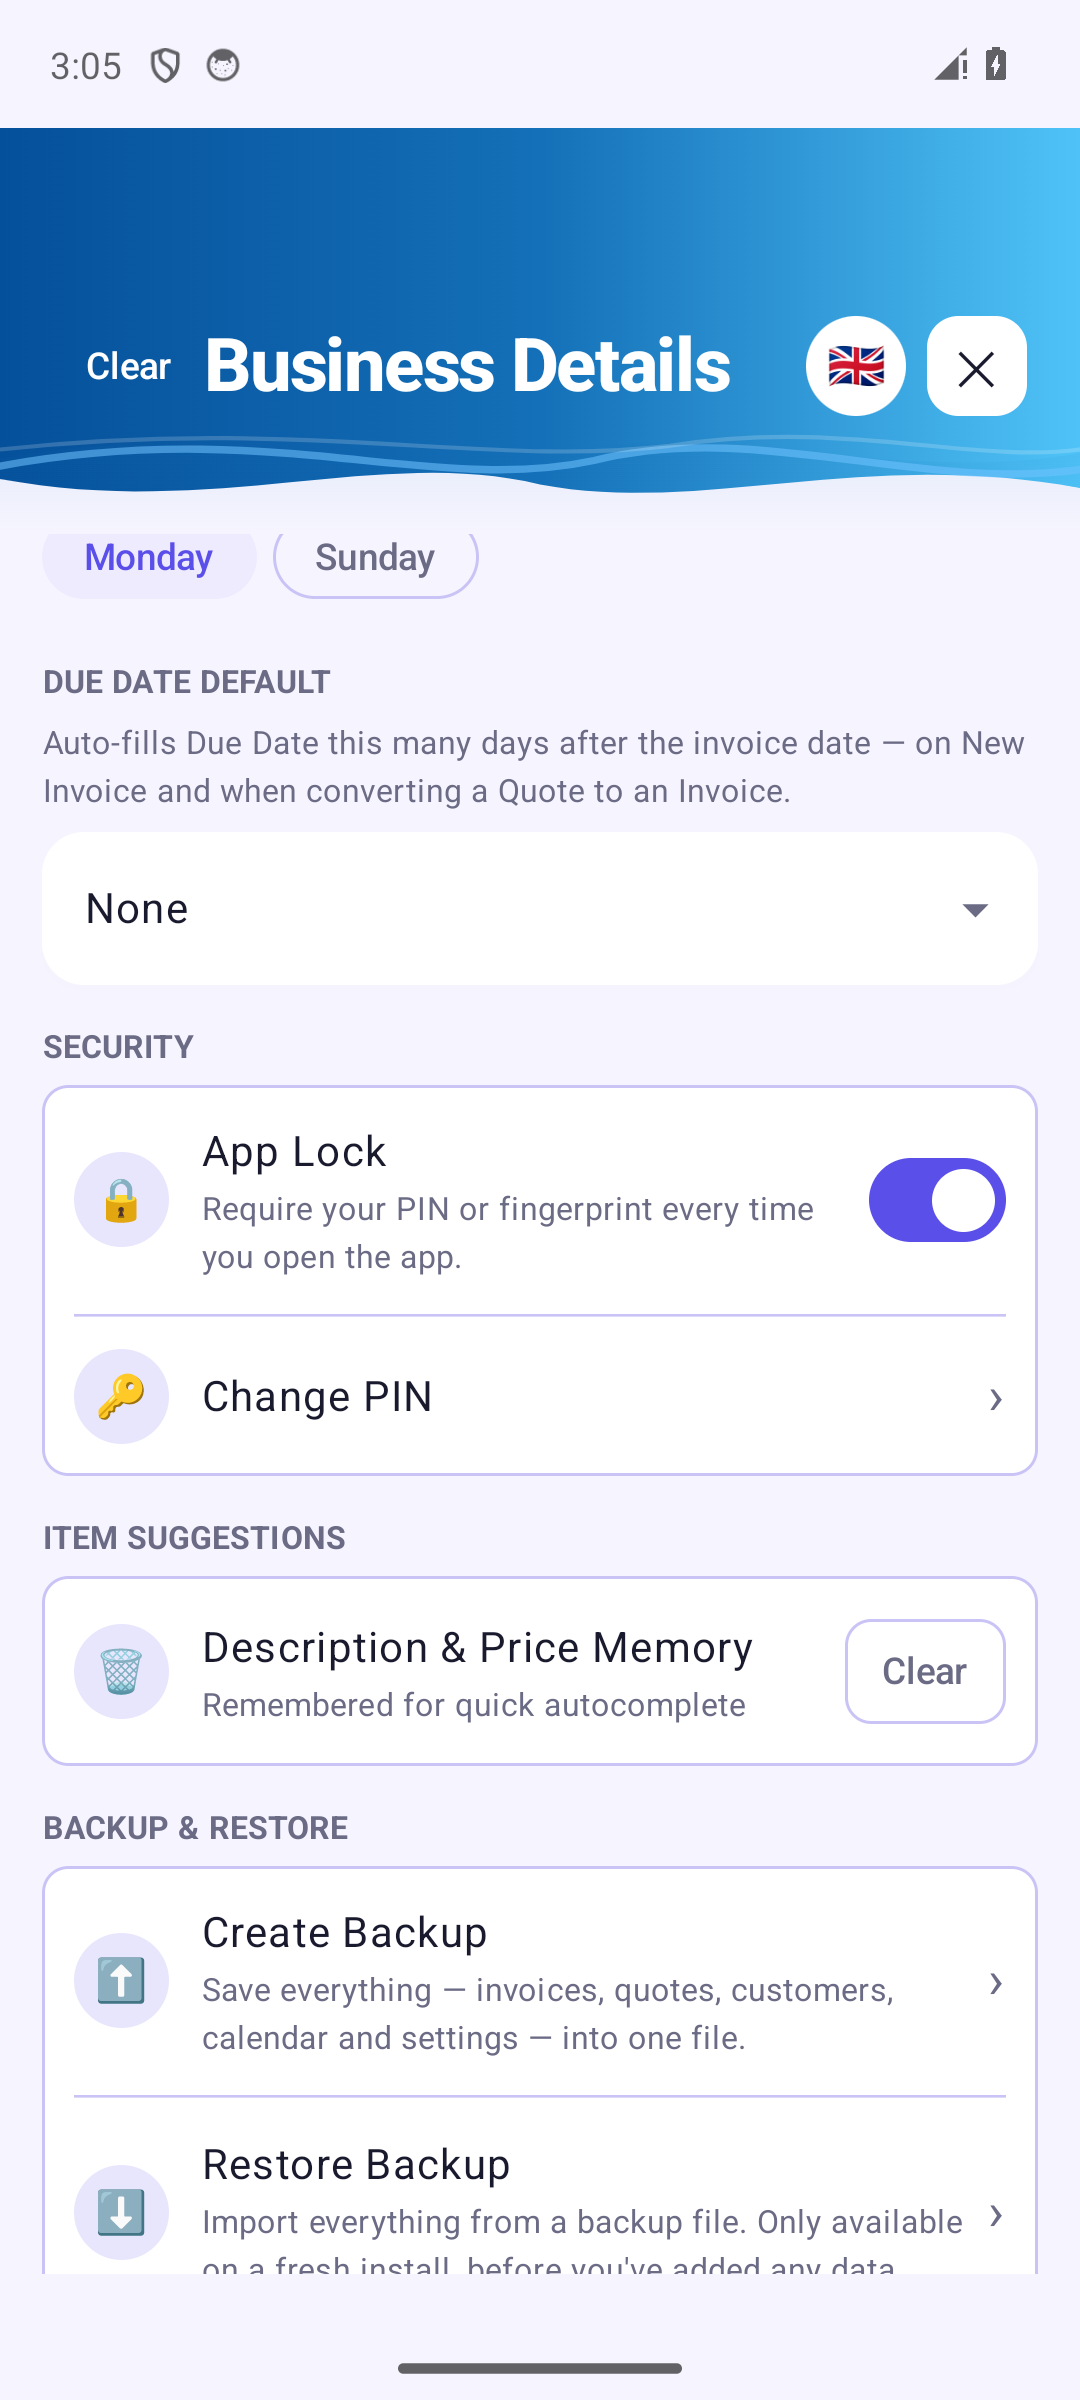
Open Settings from the gear icon, this screen is called Business Details. It starts with your optional preferences: Appearance (Light or Dark), the default Invoice Template, the Tax Label (VAT, GST…), the First Day of Week and the Due Date Default, which fills the due date automatically (e.g. Net 30). Below them come Security (see App Lock), Item Suggestions and Backup & Restore (see Backup & restore).
Description & Price Memory remembers item descriptions and prices to suggest them as you type – Clear forgets them without touching your invoices.
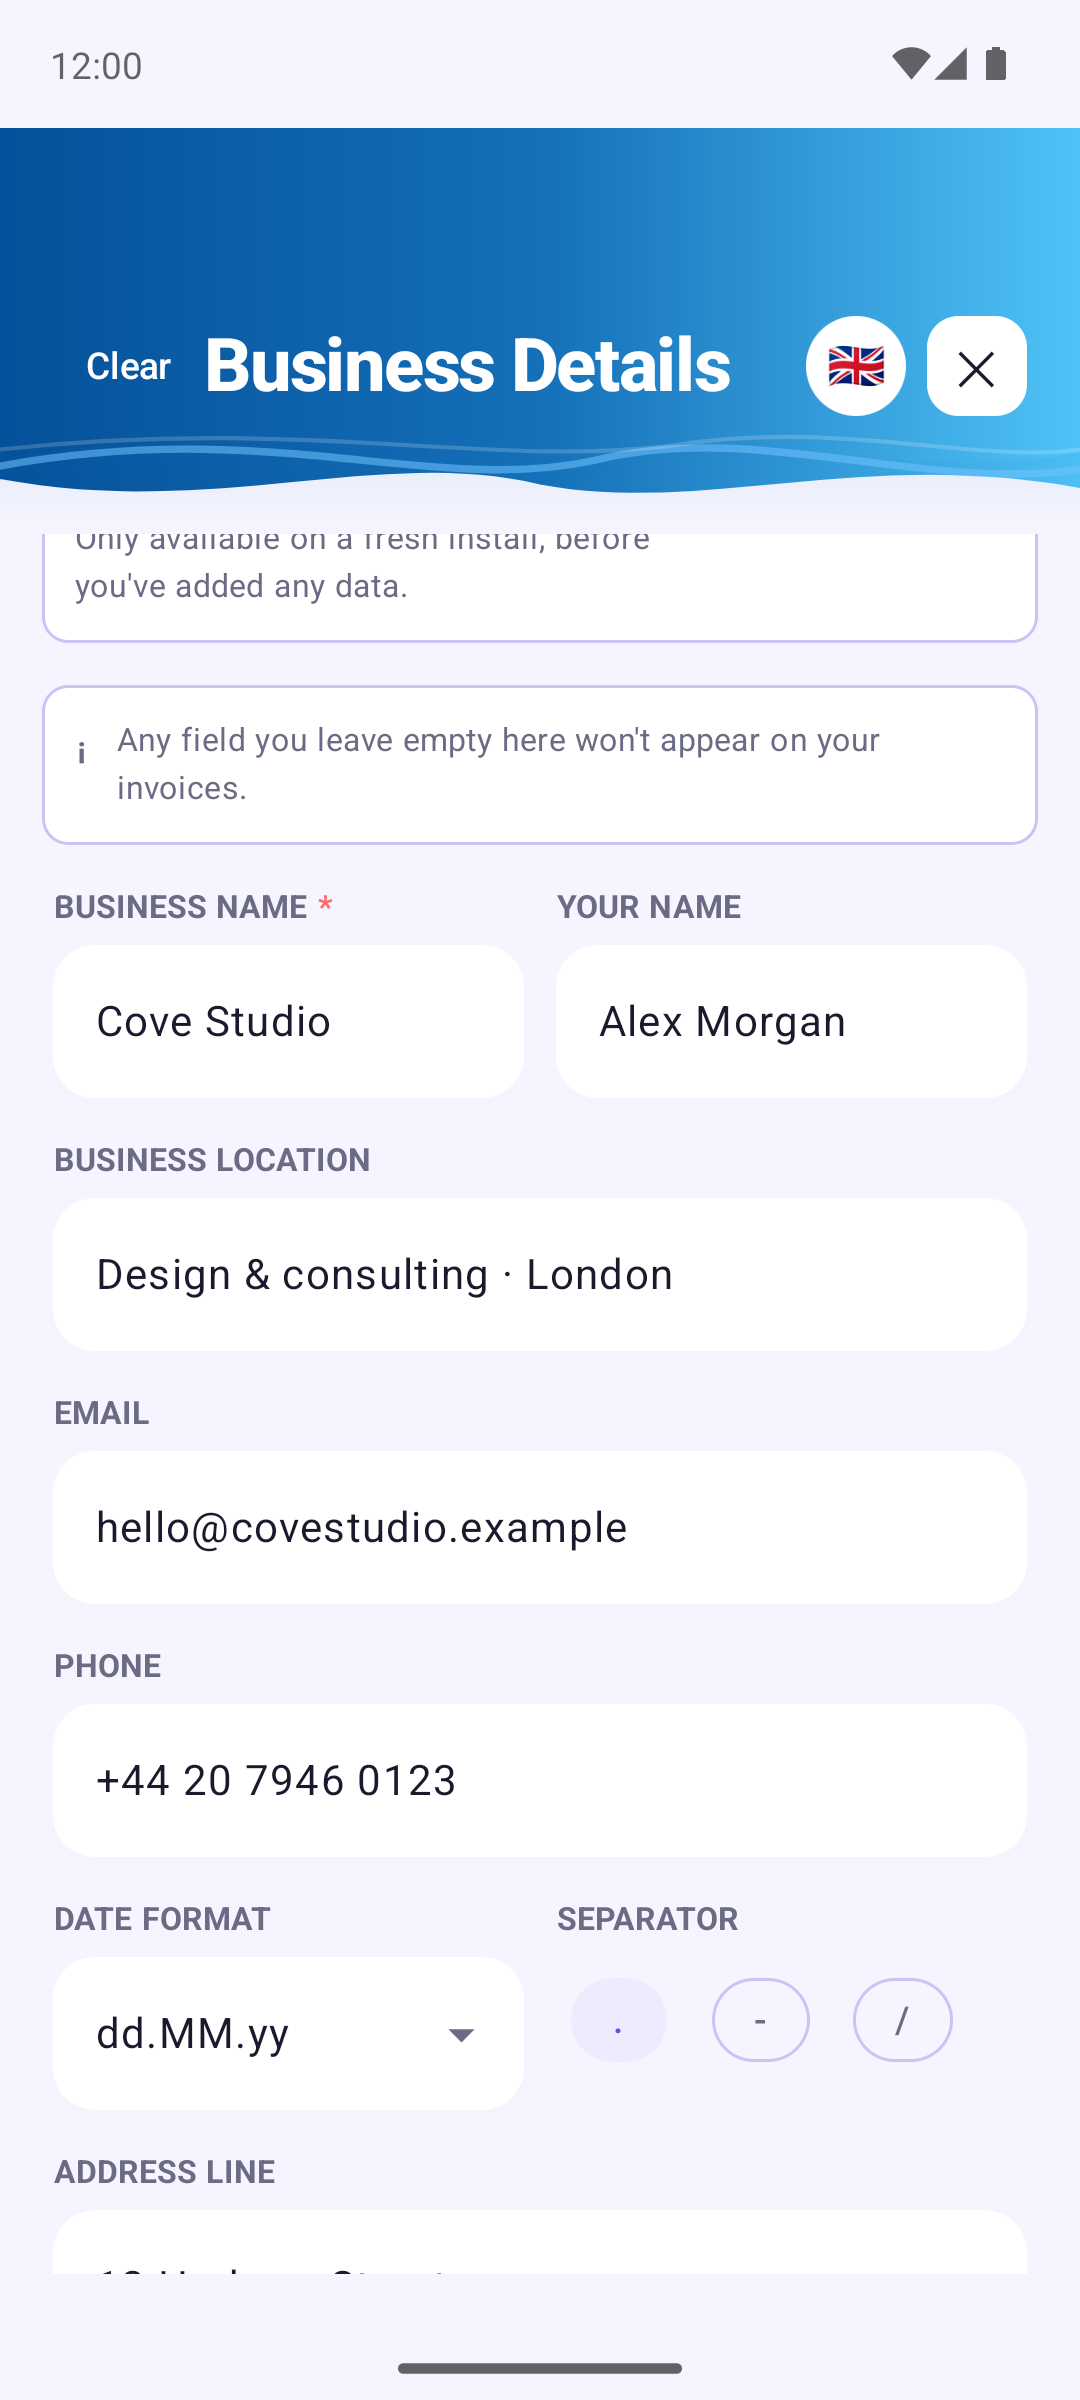
Further down is your business profile, printed on every invoice and quote: Business Name, Your Name, a short tagline (Business Location), Email, Phone, the Date Format for dates, the address, Tax ID, VAT Number, Registration Info (company number, share capital and the like), your Business Logo and your Payment Details (IBAN, PayPal.me Link). Each field has an example, and any field you leave empty does not appear on your invoices. Tap Done when you have finished, if you leave with unsaved changes you are asked to confirm.
At the very bottom: this User Guide and Share this app are displayed.
12 Backup & restore
Available with Invoice Cove Pro, under Backup & Restore. Create Backup saves everything: invoices, quotes, drafts, customers, calendar, settings, your logo and the PDFs all into one file. Choose Save Backup to store it where you want, or Share Backup to send it somewhere safe.
Restore Backup brings it all back in case you need to transfer on a new phone. It only works on a fresh install, before you have added any data, so it can never overwrite what you already have. Invoice Cove checks that the file is intact and tells you if it is damaged, if it is not an Invoice Cove backup, or was made by a newer version of the app (update first).
13 App Lock
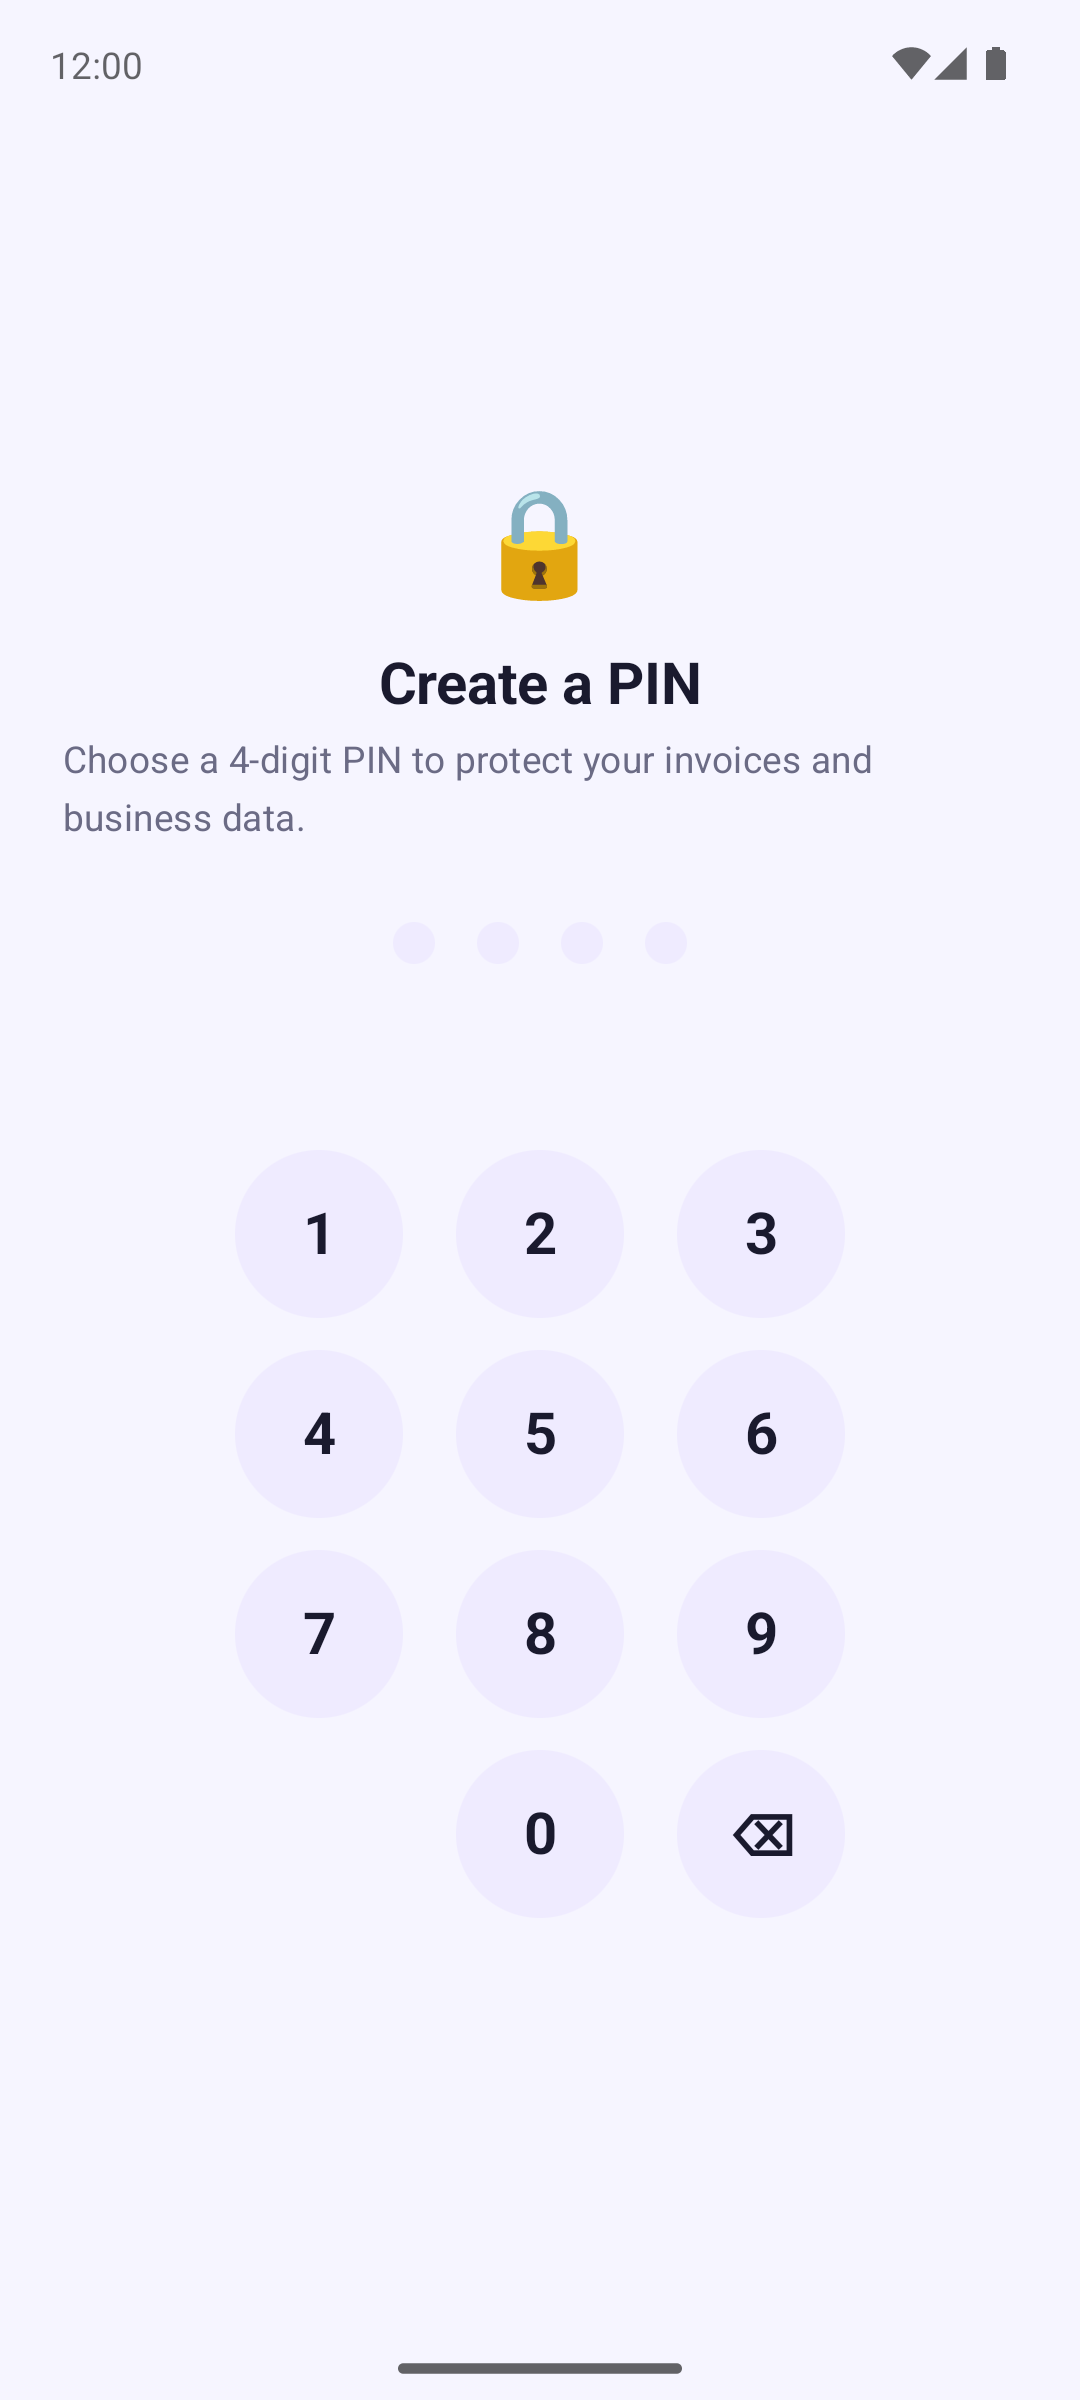
App Lock is on from the first launch: before anything else, Invoice Cove asks you to create a PIN. After that it asks for your PIN (or fingerprint) when the app is freshly opened, or after the phone restarts, not each time you switch back to it. You can turn it off under Security.
- Set PIN: choose a 4-digit PIN and confirm it.
- You then get a 6-digit recovery code, shown only once. Write it down and keep it safe.
- If your phone supports it, unlock with your fingerprint instead (Use Fingerprint).
- Forgot the PIN? Use Forgot PIN? and enter the recovery code. After 5 wrong attempts you must wait 30 seconds – the wait grows with more wrong attempts.
14 Languages
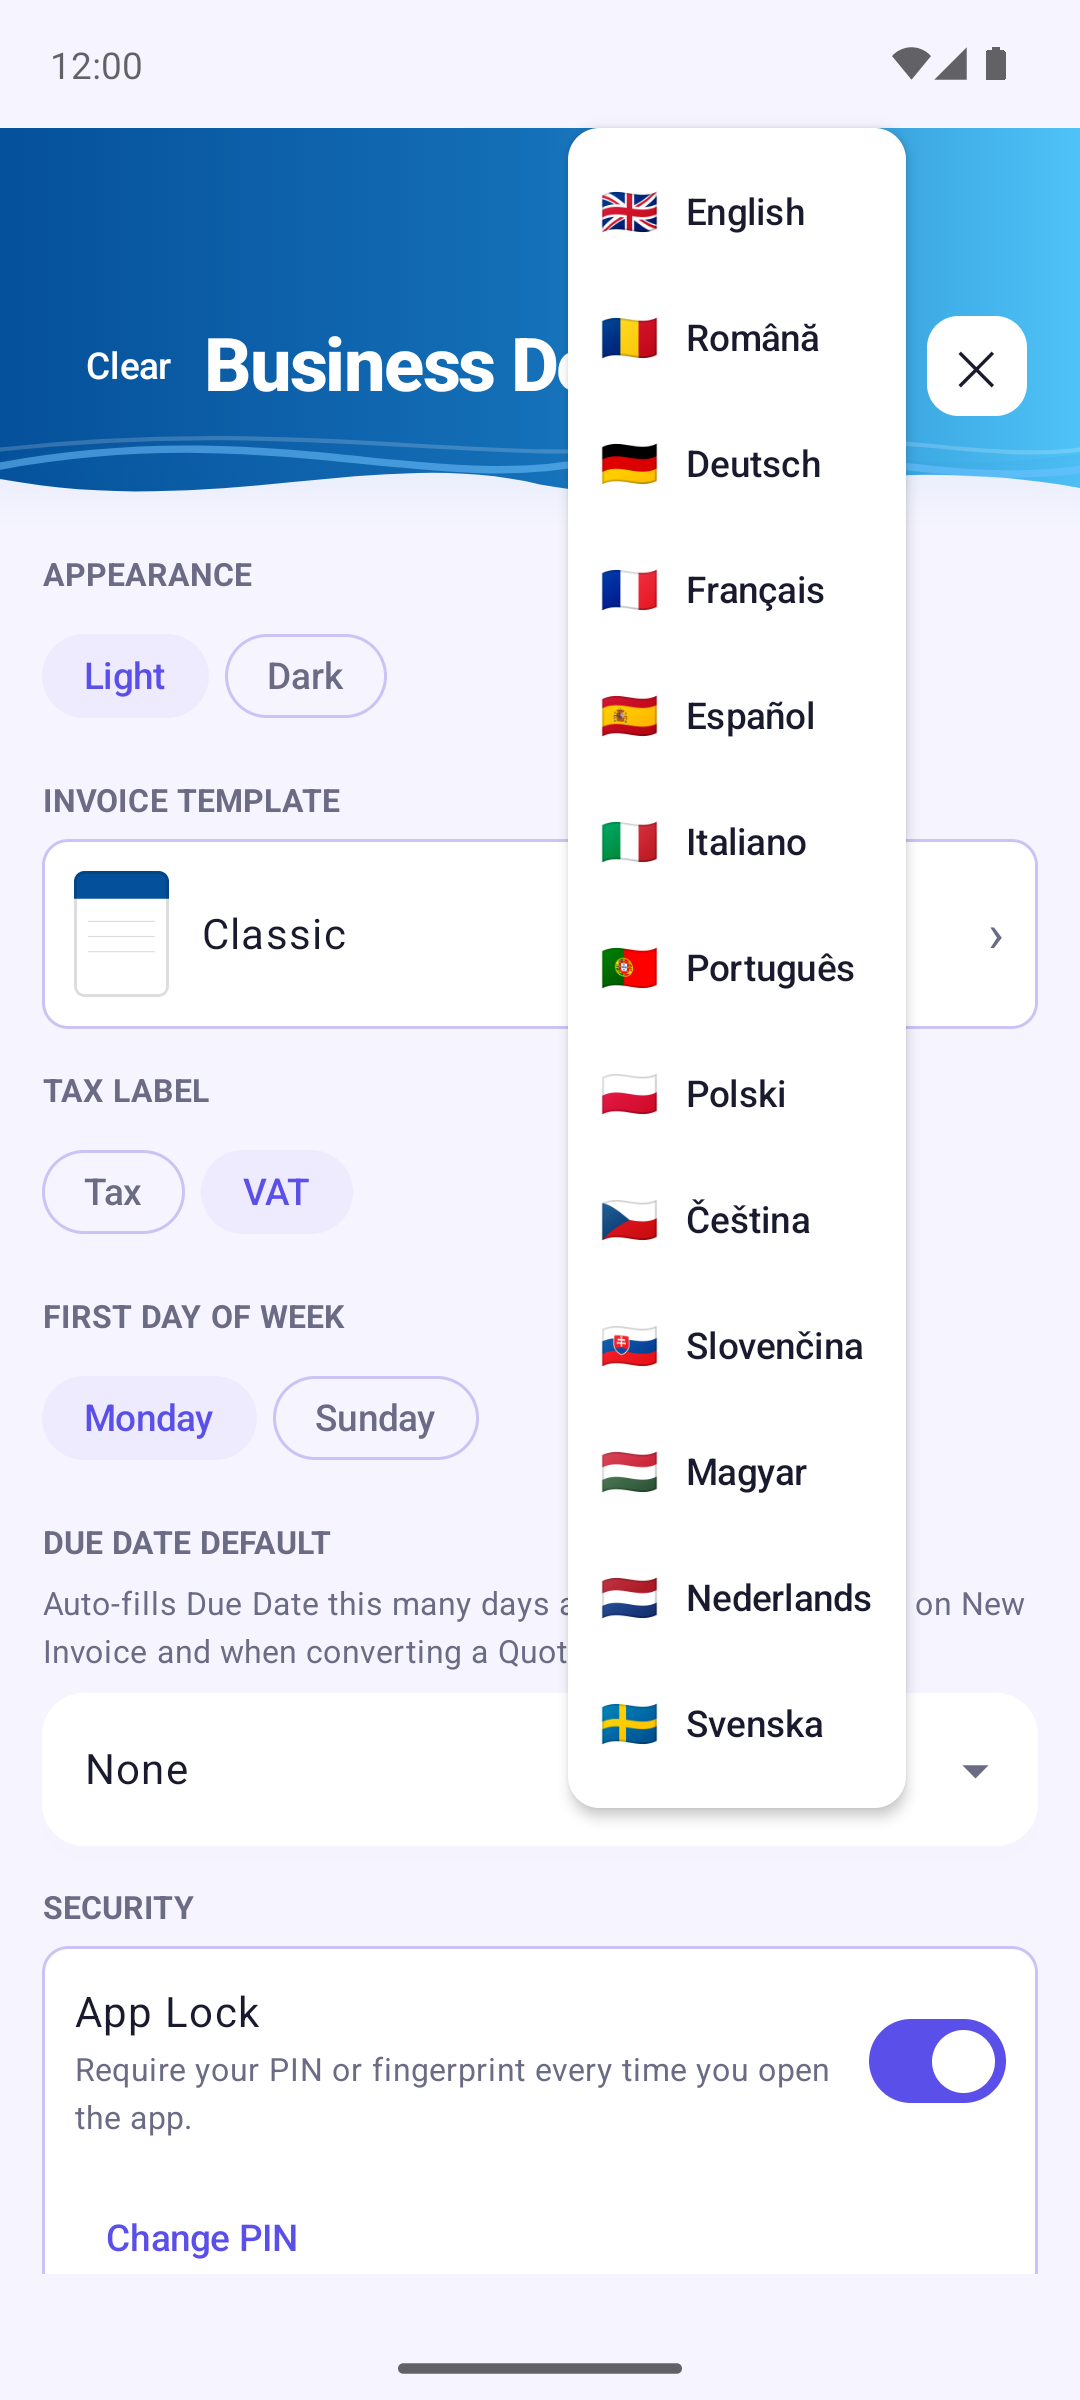
Invoice Cove speaks 13 languages: English, Română, Deutsch, Français, Español, Italiano, Português, Polski, Čeština, Slovenčina, Magyar, Nederlands and Svenska. Tap the round flag icon at the top of Settings to switch — the app changes immediately.
The text on your PDFs and on Excel/CSV exports follows the language the app is set to, and this guide is available in the same 13 languages (use the language bar at the top of the page).
15 PDF templates
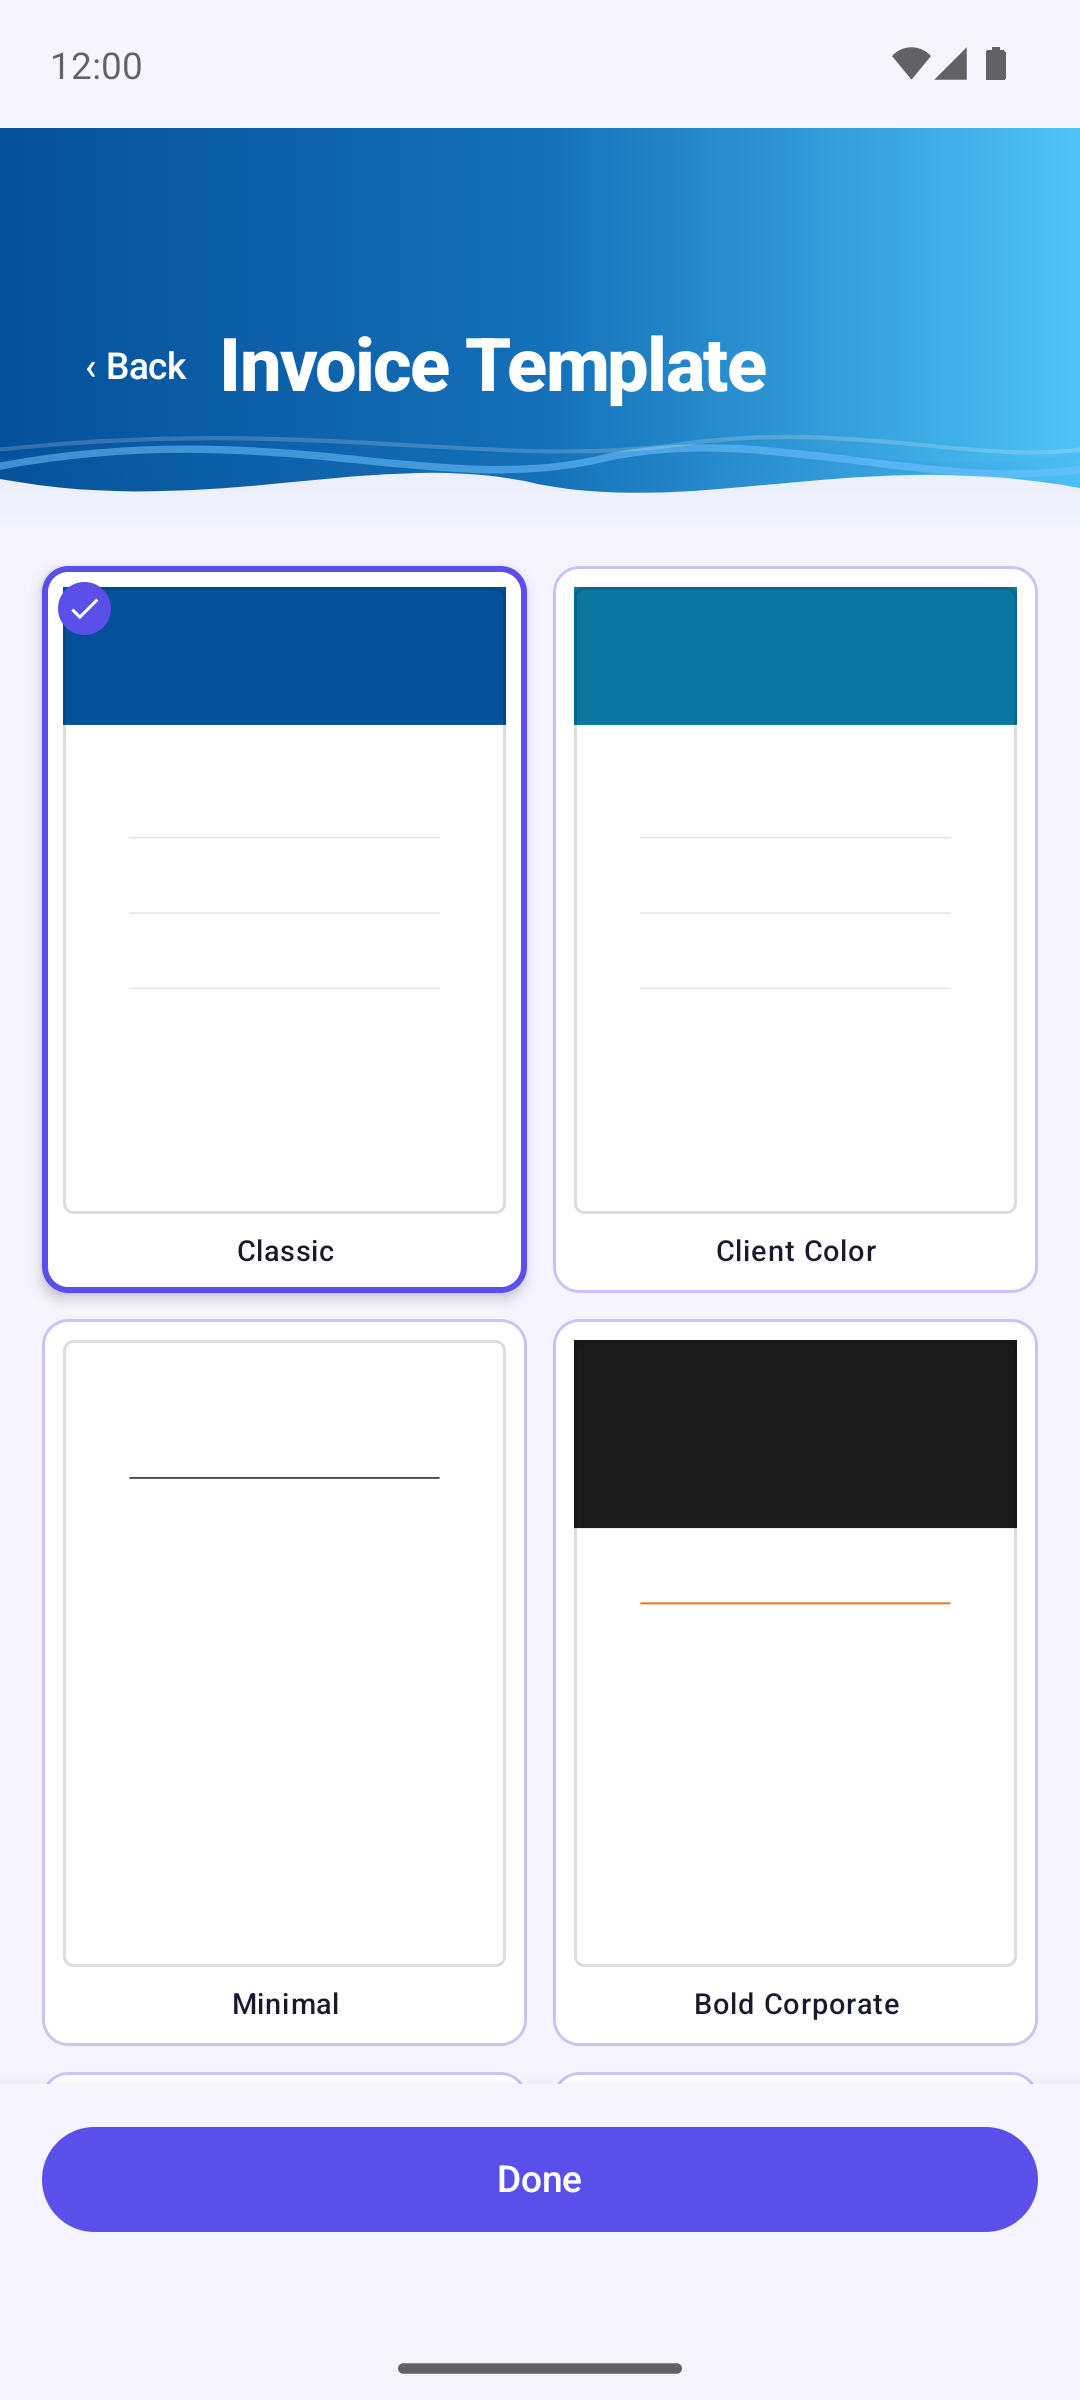
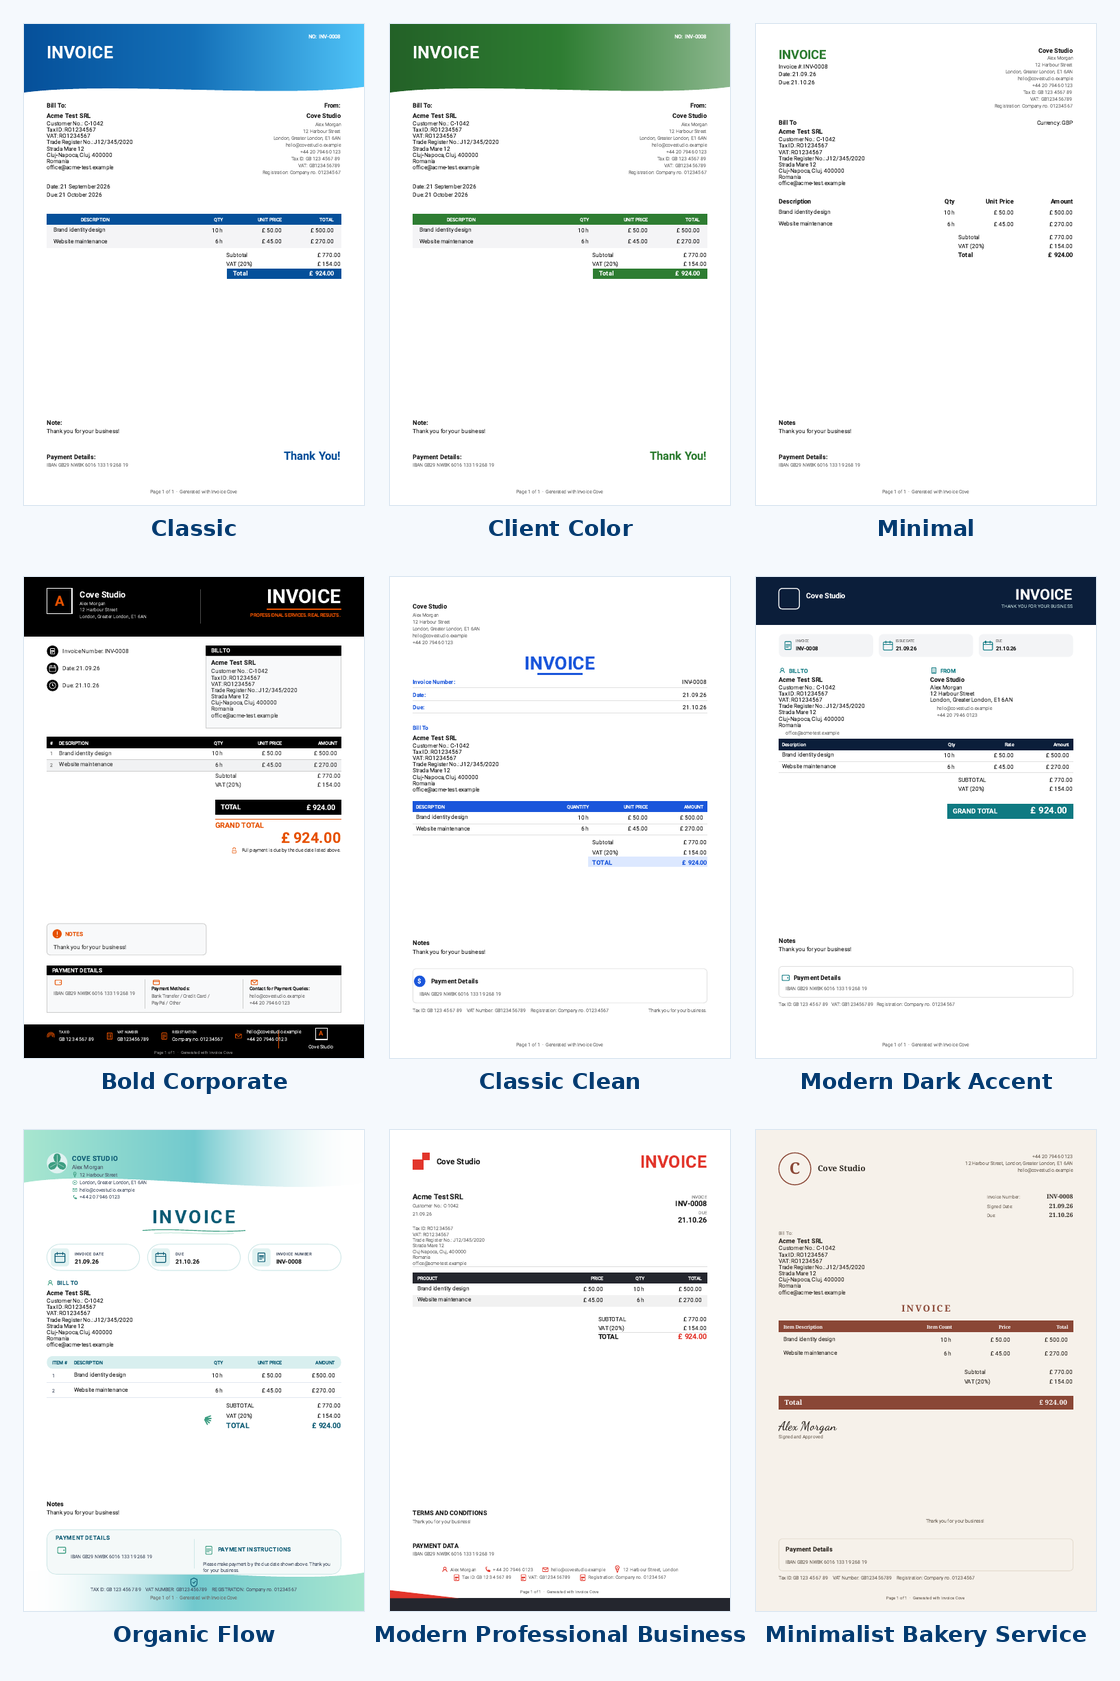
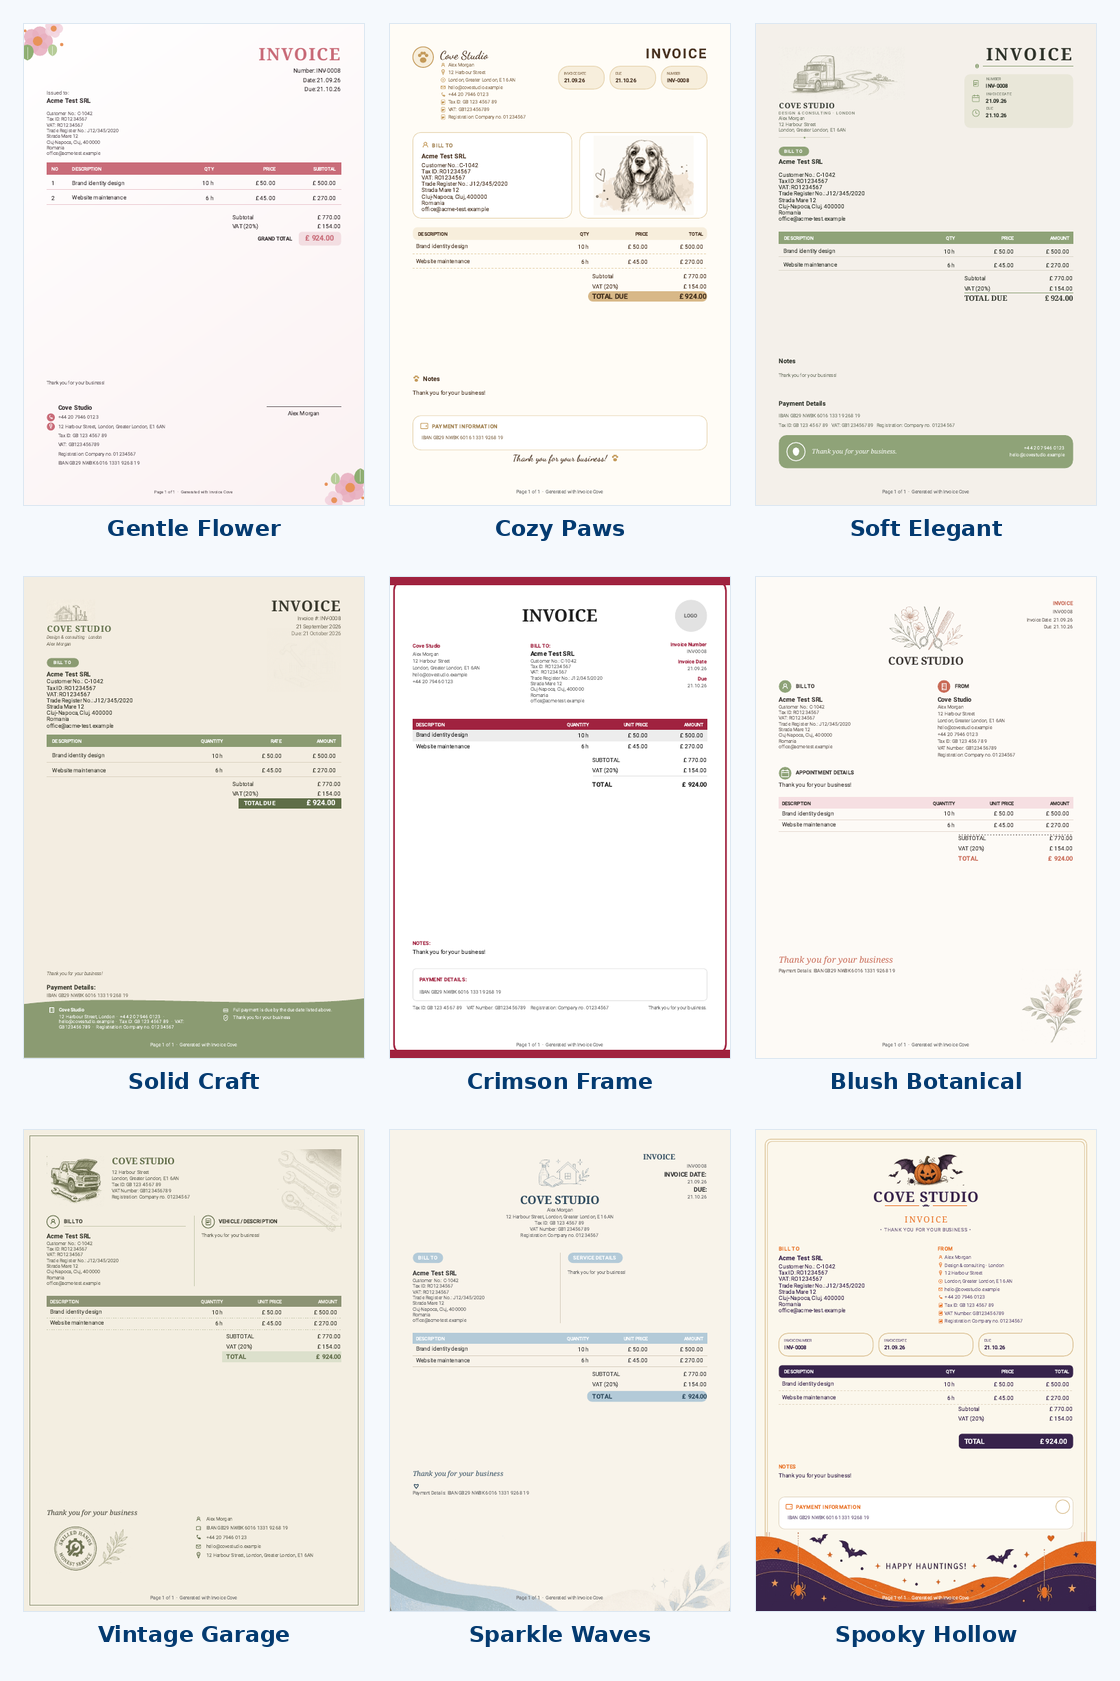
Invoice Cove starts with 18 PDF designs: Classic, Client Color (tinted with the customer's colour), Minimal, Bold Corporate, Classic Clean, Modern Dark Accent, Organic Flow, Modern Professional Business, Minimalist Bakery Service, Gentle Flower, Cozy Paws, Soft Elegant, Solid Craft, Crimson Frame, Blush Botanical, Vintage Garage, Sparkle Waves and Spooky Hollow.
Pick your default in Settings → Invoice Template: tap a design, then Done. It applies to everything you generate from then on. For a single invoice or quote, use the Template button on the form.
Every template prints the same information: your business details, the customer's details, items with their unit and date, totals, notes and payment details — but only what you filled in. Long invoices continue on a second page, with the totals kept together with the last item.
16 Free plan vs. Invoice Cove Pro
Invoice Cove is free to use, with a few sensible limits:
- Up to 3 invoices generated per calendar month
- Up to 3 quotes generated per calendar month
- Up to 3 customers at a time
- Invoice and quote numbers are assigned automatically and cannot be edited
- Excel, CSV and ZIP export are Pro-only
- Backup & Restore is Pro-only
Invoice Cove Pro is a single one-time purchase through Google Play (not a subscription) that removes every one of those limits for good. Drafts, all templates and languages, App Lock, and creating, previewing and sharing documents are free for everyone. See the Terms of Use for the full details.